
MacBook Pro 13" Retina Display Late 2013 Heat Sink Replacement

Введение
Перейти к шагу 1Use this guide to remove or replace the heat sink.
Don't forget to follow our thermal paste application guide after you have removed your heat sink.
Выберете то, что вам нужно


-
Инструмент, используемый на этом этапе:Magnetic Project Mat$19.95
-
Remove the following ten screws securing the lower case to the upper case:
-
Two 2.3 mm P5 Pentalobe screws
-
Eight 3.0 mm P5 Pentalobe screws
-
-
-
Wedge your fingers between the upper case and the lower case.
-
Gently pull the lower case away from the upper case to remove it.
-
-
-
Use the flat end of a spudger to lift the battery connector straight up out of its socket on the logic board.
-
-
-
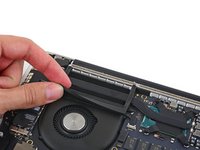
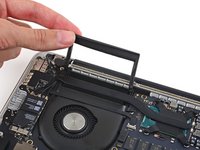
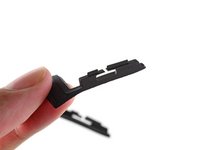
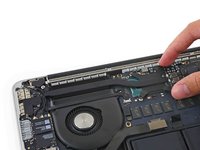
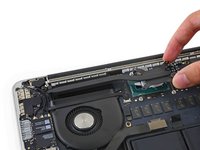
Carefully remove the rubber fan bumper from the edge of the heat sink.
-
-
-
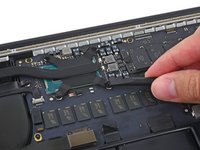
Use the flat end of a spudger to peel the four foam stickers off of the heat sink screws.
-
-
-
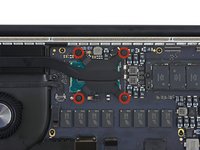
Remove the following screws securing the heat sink to the logic board:
-
Four 2.6 mm T5 screws
-
One 2.4 mm Phillips #000 screw
-


To reassemble your device, follow these instructions in reverse order.
To reassemble your device, follow these instructions in reverse order.
Отменить: Я не выполнил это руководство.
25 человек успешно провели ремонт по этому руководству.


2 Комментариев
If you are following this guide to replace the thermal paste on the CPU i think you should know that - if you, like i, have decided to remove the black electrical tape that is on the CPU, make sure you are super careful when using Thermal Paste Remover Liquid. Any liquid can easily get under the CPU because there is enough gap from every side.
My Mac lives but now i live with the memory of worryingly wondering whether i killed it while cleaning out the liquid from underneath the CPU without lifting it.
Thanks a lot, used this guide to change thermal paste on my oldie 🙏