
MacBook Pro Retina 2012–2015 Feet Replacement

Введение
Перейти к шагу 1This is a prerequisite guide describing how to replace MacBook Pro Retina feet, applicable to models A1425, A1502, and A1398. For a full guide including lower case removal, refer to the specific MacBook Pro device pages.
Выберете то, что вам нужно
Ремонтный комплект
Этот комплект содержит все детали и инструменты, используемые в руководстве.

Запчасти

Инструменты


Показать больше…
-
-
Peel away any stickers from the backside of the rear case covering the feet you have chosen to replace.
-
-
Инструмент, используемый на этом этапе:Tweezers$4.99
-
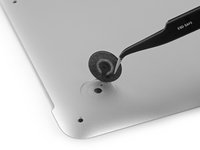
Remove any broken or damaged feet.
-
If the old foot is difficult to remove, use a hair dryer or a heat gun to apply some heat to the area and loosen the adhesive.
-
-
-
Wipe the foot cavity with an isopropyl alcohol prep pad to remove any cleaner residue and prep the area for the adhesive on the new foot.
-
-
-
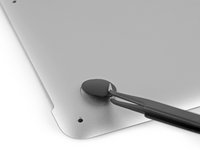
Align the new foot inside the cavity.
-
Lay the foot down while keeping it properly aligned.
-
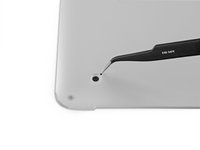
Check for proper alignment from the inside of the case. The alignment nub should be slightly visible through the alignment hole.
-
-
-
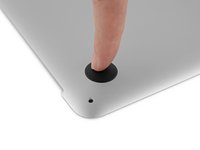
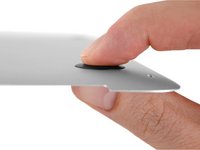
Press the new foot into place firmly with your finger, then apply pressure by pinching the foot from either side of the case with your finger and your thumb.
-
Maintain pressure for 30 seconds to set the pressure-sensitive adhesive.
-
Repeat the last seven steps for any remaining broken or worn feet.
-


To reassemble your device, follow these instructions in reverse order.
To reassemble your device, follow these instructions in reverse order.
Отменить: Я не выполнил это руководство.
3 человек успешно провели ремонт по этому руководству.
