
PlayStation Vita Speakers Replacement

Введение
Перейти к шагу 1This guide takes you through installing the speakers in the PlayStation Vita.
Выберете то, что вам нужно


-
-
Using a Phillips #00 screwdriver, remove the four 6.4mm screws on the back casing.
-
-
-
Using your fingernail or a spudger, pry open the accessory port cover on the top of the device.
-
Using a Phillips #00 screwdriver, remove the two 5.4mm screws hidden beneath the accessory port cover.
-
-
-
Remove the two 5.4mm Phillips #00 screws on the bottom of the device near the charging port.
-
-
-
Beginning at the sides of the device, use a plastic opening tool to separate the front and rear cases.
-
Continue working your way around the device gently prying it open.
-
-
-
Gently separate the two cases, minding the battery and the touch screen controller connectors holding the two cases together.
-
-
-
Using a spudger, free the touch screen controller flex cable by gently prying up the connection.
-
-
-
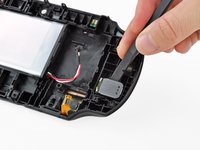
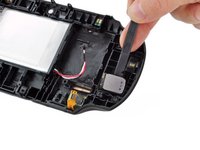
Gently insert a spudger along the side of the speaker on the back casing assembly. Pry the speaker off the casing and remove it.
-


To reassemble your device, follow these instructions in reverse order.
To reassemble your device, follow these instructions in reverse order.
Отменить: Я не выполнил это руководство.
3 человек успешно провели ремонт по этому руководству.


2 Комментариев
my ps vita 3G model get washed, i dismantle the console and both speakers to let it dry. 1 month later my vita woke up but now the speakers sound bad, is there a way to fix them?