Перейти к основному содержанию
Присоединяйся к сообществу ремонтников - Создай аккаунт

Samsung Watch Active Screen Replacement

Выберете то, что вам нужно

  1. Samsung Watch Active Screen Replacement, Turn off the watch: шаг 1, изображение 1 из 2 Samsung Watch Active Screen Replacement, Turn off the watch: шаг 1, изображение 2 из 2
    • Turn off the Galaxy Watch Active by pushing and holding the bottom button for approximately 3 seconds. You should feel a short vibration.

    • When the "Power off" symbol appears tap the center of the screen to make it shut down. You should feel a longer vibration for confirmation.

    Спросите у FixBot

    Добавить комментарий

  2. Samsung Watch Active Screen Replacement, Remove the rear screws: шаг 2, изображение 1 из 1
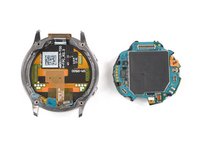
    • Use a Tri-point Y00 screwdriver to remove the four 4 mm-long screws on the back of the watch.

    Спросите у FixBot

    Добавить комментарий

  3. Samsung Watch Active Screen Replacement, Separate the back cover from the housing: шаг 3, изображение 1 из 3 Samsung Watch Active Screen Replacement, Separate the back cover from the housing: шаг 3, изображение 2 из 3 Samsung Watch Active Screen Replacement, Separate the back cover from the housing: шаг 3, изображение 3 из 3
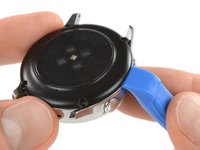
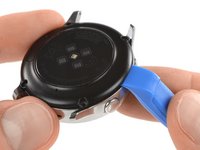
    • Use an opening tool and place it between the plastic back cover and the metal housing near the buttons.

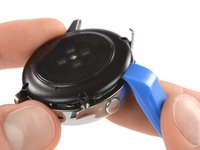
    • Push the tip of the opening tool into the gap to separate the back cover from the housing.

    • Don’t remove the back cover all the way yet. There is a cable connecting it to the motherboard.

    Спросите у FixBot

    Добавить комментарий

  4. Samsung Watch Active Screen Replacement, Disconnect the sensor array: шаг 4, изображение 1 из 2 Samsung Watch Active Screen Replacement, Disconnect the sensor array: шаг 4, изображение 2 из 2
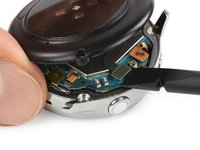
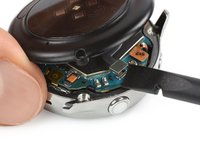
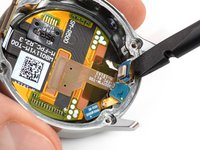
    • Carefully lift the back cover approximately 2 cm to access the sensor array connector near the two buttons.

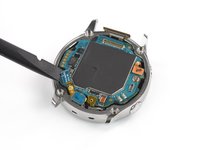
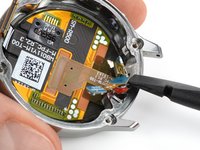
    • Use a spudger to disconnect the sensor array from the motherboard.

    Спросите у FixBot

    Добавить комментарий

  5. Samsung Watch Active Screen Replacement, Remove the back cover: шаг 5, изображение 1 из 1
    • Remove the back cover.

    Спросите у FixBot

    Добавить комментарий

  6. Samsung Watch Active Screen Replacement, Disconnect the display and the mic array: шаг 6, изображение 1 из 3 Samsung Watch Active Screen Replacement, Disconnect the display and the mic array: шаг 6, изображение 2 из 3 Samsung Watch Active Screen Replacement, Disconnect the display and the mic array: шаг 6, изображение 3 из 3
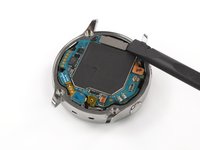
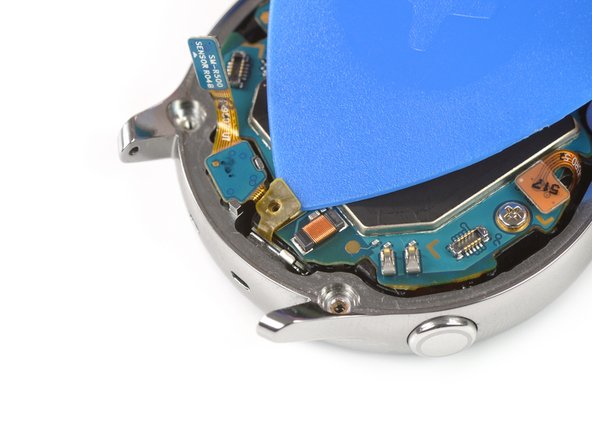
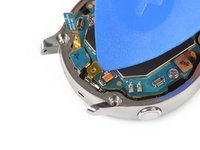
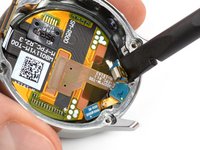
    • Use a spudger to disconnect the display assembly and the microphone and pressure sensor array.

    Спросите у FixBot

    Добавить комментарий

  7. Samsung Watch Active Screen Replacement, Undo the mic tape: шаг 7, изображение 1 из 3 Samsung Watch Active Screen Replacement, Undo the mic tape: шаг 7, изображение 2 из 3 Samsung Watch Active Screen Replacement, Undo the mic tape: шаг 7, изображение 3 из 3
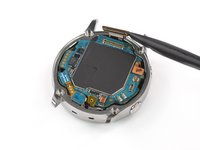
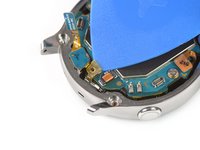
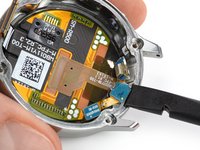
    • Use an opening pick to peel back the thin tape belonging to the microphone array.

    • When re-assembling make sure this tape properly sticks to the motherboard by pressing it down with the flat end of a spudger.

    Спросите у FixBot

    Добавить комментарий

  8. Samsung Watch Active Screen Replacement, Lift the core assembly: шаг 8, изображение 1 из 2 Samsung Watch Active Screen Replacement, Lift the core assembly: шаг 8, изображение 2 из 2
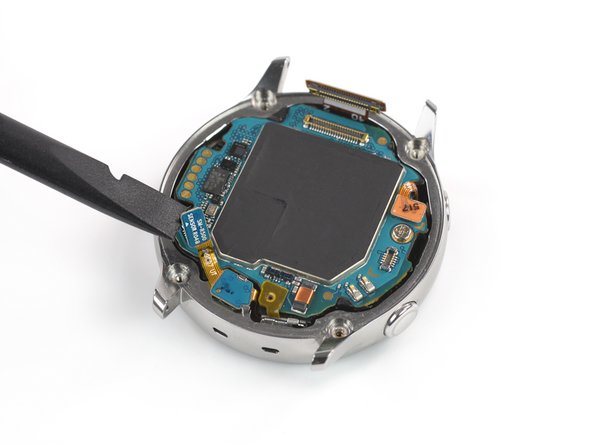
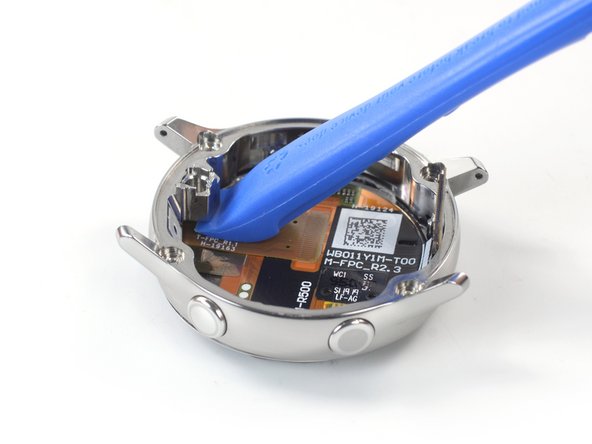
    • Insert an opening pick at the bottom right between the motherboard and the frame to lift up the core assembly.

    Спросите у FixBot

    Добавить комментарий

  9. Samsung Watch Active Screen Replacement, Remove the core assembly: шаг 9, изображение 1 из 3 Samsung Watch Active Screen Replacement, Remove the core assembly: шаг 9, изображение 2 из 3 Samsung Watch Active Screen Replacement, Remove the core assembly: шаг 9, изображение 3 из 3
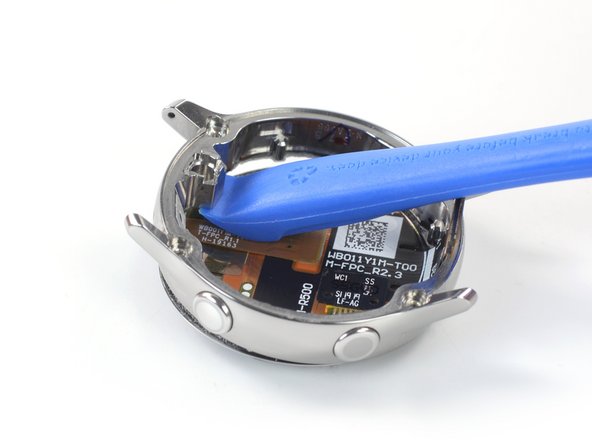
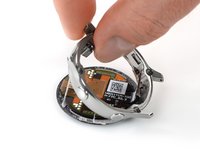
    • Lift out and remove the core assembly.

    Спросите у FixBot

    Добавить комментарий

  10. Samsung Watch Active Screen Replacement, Loosen the mic: шаг 10, изображение 1 из 2 Samsung Watch Active Screen Replacement, Loosen the mic: шаг 10, изображение 2 из 2
    • Use a spudger to loosen the microphone which is fixed to the frame with mild adhesive.

    Спросите у FixBot

    Добавить комментарий

  11. Samsung Watch Active Screen Replacement, Free the barometric sensor: шаг 11, изображение 1 из 2 Samsung Watch Active Screen Replacement, Free the barometric sensor: шаг 11, изображение 2 из 2
    • Use a spudger to lift the pressure sensor up and out of its recess in the frame.

    Спросите у FixBot

    Добавить комментарий

  12. Samsung Watch Active Screen Replacement, Remove the mic array: шаг 12, изображение 1 из 1
    • Carefully remove the microphone and barometric sensor array from the frame.

    Спросите у FixBot

    Добавить комментарий

  13. Samsung Watch Active Screen Replacement, Loosen the screen adhesive: шаг 13, изображение 1 из 1
    Спросите у FixBot

    Добавить комментарий

  14. Samsung Watch Active Screen Replacement, Separate the screen and frame: шаг 14, изображение 1 из 3 Samsung Watch Active Screen Replacement, Separate the screen and frame: шаг 14, изображение 2 из 3 Samsung Watch Active Screen Replacement, Separate the screen and frame: шаг 14, изображение 3 из 3
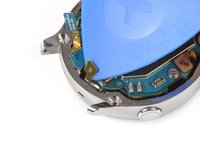
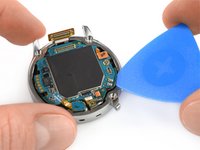
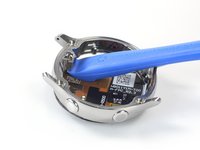
    • Insert the opening tool under the frame where the sensor array was located.

    • Pry upwards to separate the screen from the frame.

    Спросите у FixBot

    Добавить комментарий

  15. Samsung Watch Active Screen Replacement, Remove the screen: шаг 15, изображение 1 из 3 Samsung Watch Active Screen Replacement, Remove the screen: шаг 15, изображение 2 из 3 Samsung Watch Active Screen Replacement, Remove the screen: шаг 15, изображение 3 из 3
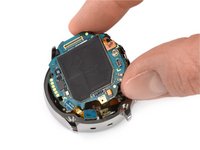
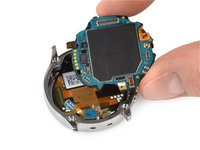
    • Use your fingers to pull the frame off the remaining screen adhesive.

    • Clean any remaining adhesive from the frame using isopropyl alcohol (>90%) before installing the new screen.

    Спросите у FixBot

    Добавить комментарий

Заключение

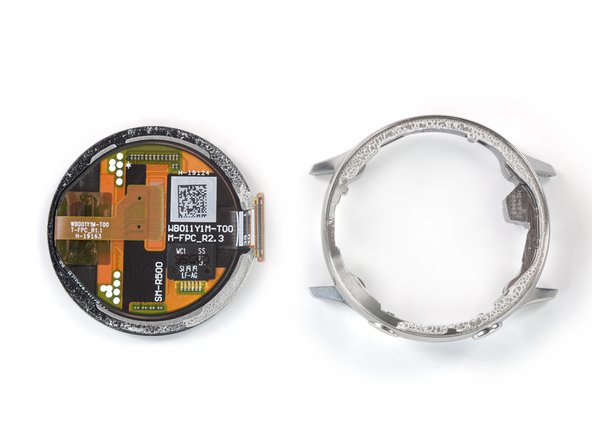
Compare your new replacement part to the original part—you may need to transfer remaining components or remove adhesive backings from the new part before installing.

To reassemble your device, follow these instructions in reverse order.

Take your e-waste to an R2 or e-Stewards certified recycler.

Repair didn’t go as planned? Try some basic troubleshooting, or ask our Answers community for help.

Отменить: Я не выполнил это руководство.

4 человек успешно провели ремонт по этому руководству.

Tobias Isakeit

Участник с: 03/31/14

133 727 Репутация

Автор 189 руководств

Команда

Tobias Isakeit - Repairability Engineer Участник Tobias Isakeit - Repairability Engineer

Business

1 член

Автор 1 145 руководств

3 Комментарии к руководству

What replacement adhesive is needed? I think my screen is ok, but it is falling out and I need to reattach it.

Rosalie E. Morgan - Ответить Поделиться

Try searching on Ali Express or Wish, etc. I just completed a screen replacement, and the screen I got came with 2 adhesives for it.

Colm O'Sullivan - Ответить Поделиться

How do I put the mic array back in?

Mason Thomas - Ответить Поделиться

Добавить комментарий

Статистика просмотров:

За последние 24 часов: 6

За последние 7 дней: 31

За последние 30 дней: 147

За всё время: 6,370