
Toshiba Satellite P55W-C5316 Motherboard Replacement
Введение
Перейти к шагу 1The motherboard acts as the central hub of communication between all of the components in your device. A failing motherboard may affect the rest of the components in your device. Symptoms of a failing motherboard include the blue screen of death (BSoD), frozen screen, etc. If you’re looking to replace the motherboard in your laptop, follow these instructions to remove the motherboard from your device.
Выберете то, что вам нужно
Инструменты


Показать больше…
-
-
Unscrew the .3mm Phillips head screws on the back panel using the PH1 screwdriver.
-
-
-
Insert the opening tool in between the back panel and the laptop to pry it open.
-
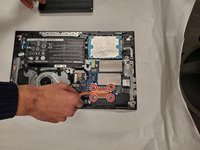
Lift the panel from the front off of the laptop.
-
-
-
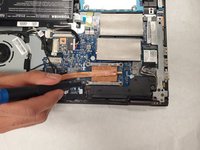
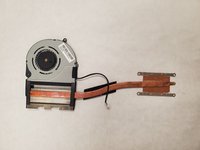
Remove the screws securing the 4 corners of the heatsink.
-
Gently remove the heatsink. Keep in mind thermal paste is used and it may be slightly difficult to remove.
-
-
-
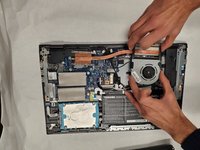
Remove the small, beige colored connector securing the fan to the laptop and remove the fan and heatsink assembly from the laptop.
-
-
-
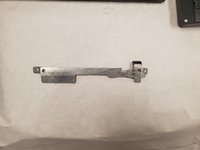
Using a Phillips #00 screwdriver, remove the two screws on the top left corner of the USB protector (metal bar located on the left side of the motherboard).
-
-
-
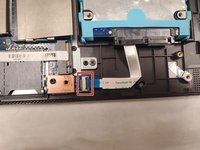
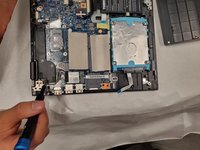
Disconnect the hard drive (silver rectangular box located on the bottom left corner of the laptop) by flipping the small black latch securing the connecter upwards, and pulling the connecter out.
-
-
-
Using the Phillips #00 screwdriver, remove the two screws on both ends of black rectangular plastic bar labeled “R” located on the top edge of the motherboard.
-
-
-
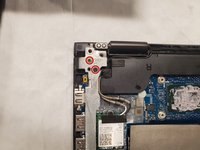
Remove display cables located on both sides of the beige located on the right side of the “R” bar.
-
-
-
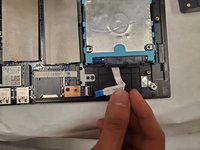
Remove the black cable labeled “M/B” ( keep hand grounded) by pulling towards you while keeping the cable parallel to the laptop.
-
-
-
Remove the display cable located directly below the “M/B” cable by removing the tape and pulling the cable to the right while keeping it parallel to the laptop.
-
-
-
Remove the USB connector (white rectangle) located above the top left corner of the battery.
-
-
-
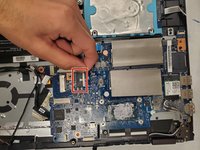
Use the Phillips #00 screwdriver to remove the three screws securing the motherboard to the laptop (located on rectangular/circular copper surfaces).
-
-
-
Remove the yellow tape above the battery connector (located above top right corner of hard drive).
-
-
-
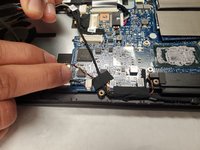
Remove the connector by flipping up the black switch and pulling the blue tipped cable out.
-
-
-
Remove the second battery connector attached to motherboard (larger of the two).
-
-
-
Remove the cable connecting the motherboard to the laptop (located on right side of motherboard).
-
-
-
Pull up the black tab located to the left of previously removed connector cable.
-
-
-
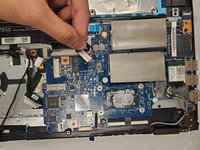
Remove the wireless adapter (white rectangle attached to surface of motherboard).
-


To reassemble your device, follow these instructions in reverse order.
To reassemble your device, follow these instructions in reverse order.
Команду

IUPUI, Team S2-G1, Harley Fall 2019 Участник IUPUI, Team S2-G1, Harley Fall 2019
IUPUI-HARLEY-F19S2G1
3 членов
Автор 3 руководств