Перейти к основному содержанию

Toshiba TECRA R940 Keyboard Replacement

Выберете то, что вам нужно

  1. Toshiba TECRA R940 Keyboard Replacement, Battery: шаг 1, изображение 1 из 2 Toshiba TECRA R940 Keyboard Replacement, Battery: шаг 1, изображение 2 из 2
    • Slide lock 1, located on the right side, to the unlocked position.

  2. Toshiba TECRA R940 Keyboard Replacement: шаг 2, изображение 1 из 2 Toshiba TECRA R940 Keyboard Replacement: шаг 2, изображение 2 из 2
    • While holding lock 2 (left side) in the unlocked position, pull out the battery pack.

    • It is not necessary to hold open lock 2 for re-installation.

  3. Toshiba TECRA R940 Keyboard Replacement, Back Panel: шаг 3, изображение 1 из 2 Toshiba TECRA R940 Keyboard Replacement, Back Panel: шаг 3, изображение 2 из 2
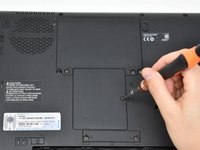
    • Unscrew the single screw on the RAM access panel using a Phillips #0 screwdriver.

    • The screw will not come apart from the panel.

    • Use a plastic opening tool to pry off the access panel.

  4. Toshiba TECRA R940 Keyboard Replacement: шаг 4, изображение 1 из 2 Toshiba TECRA R940 Keyboard Replacement: шаг 4, изображение 2 из 2
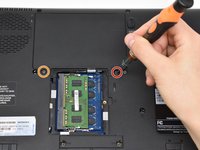
    • Remove the 11 mm screw from the right side of the hard drive access panel using a Phillips #0 screwdriver.

    • Remove the 3.5 mm screw from the left side of the access panel using a Phillips #0 screwdriver.

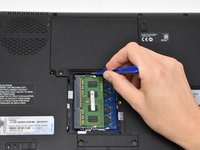
    • Use a plastic opening tool to pry off the access panel from the bottom.

  5. Toshiba TECRA R940 Keyboard Replacement: шаг 5, изображение 1 из 1
    • Remove twelve 5.5 mm screws from the main back cover using a Phillips #0 screwdriver.

    • Remove three 11 mm screws from main back cover and mini access panel using a Phillips #0 screwdriver.

    • Remove two 9.5 mm screws from the main back cover using a Phillips #0 screwdriver.

  6. Toshiba TECRA R940 Keyboard Replacement: шаг 6, изображение 1 из 2 Toshiba TECRA R940 Keyboard Replacement: шаг 6, изображение 2 из 2
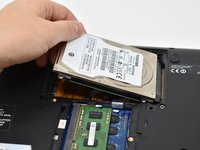
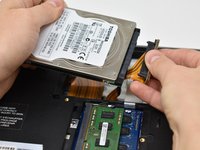
    • Lift the hard drive out of the access panel.

    • Disconnect the SATA connector from the hard drive by pulling straight out.

  7. Toshiba TECRA R940 Keyboard Replacement: шаг 7, изображение 1 из 2 Toshiba TECRA R940 Keyboard Replacement: шаг 7, изображение 2 из 2
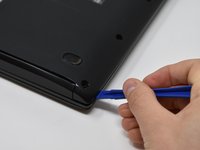
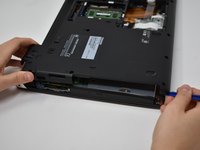
    • Insert the plastic opening tool into the edge of the laptop and pry off the back cover.

  8. Toshiba TECRA R940 Keyboard Replacement, Optical Drive: шаг 8, изображение 1 из 1
    • Remove two 2.5 mm screws from the side of the optical drive using a Phillips #0 screwdriver.

  9. Toshiba TECRA R940 Keyboard Replacement: шаг 9, изображение 1 из 1
    • Lift up the bracket covering the connector.

    • This bracket should not be fully removed from the optical drive.

  10. Toshiba TECRA R940 Keyboard Replacement: шаг 10, изображение 1 из 1
    • Gently remove the SATA connector from the port.

  11. Toshiba TECRA R940 Keyboard Replacement: шаг 11, изображение 1 из 1
    • Gently lift the optical drive out.

  12. Toshiba TECRA R940 Keyboard Replacement, Keyboard: шаг 12, изображение 1 из 2 Toshiba TECRA R940 Keyboard Replacement, Keyboard: шаг 12, изображение 2 из 2
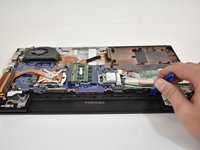
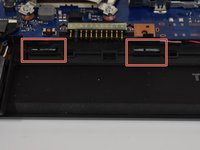
    • Move the 4 small tabs, that are placed along the empty battery space, in the direction of where the battery pack would be. They should stay unhooked without having to hold them.

  13. Toshiba TECRA R940 Keyboard Replacement: шаг 13, изображение 1 из 1
    • Flip the computer over and remove the black strip at the top of the keyboard.

    • If you are having difficulty removing the strip with your hand, try using a spudger to disconnect the strip.

  14. Toshiba TECRA R940 Keyboard Replacement: шаг 14, изображение 1 из 3 Toshiba TECRA R940 Keyboard Replacement: шаг 14, изображение 2 из 3 Toshiba TECRA R940 Keyboard Replacement: шаг 14, изображение 3 из 3
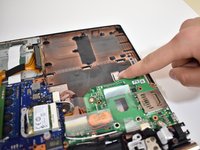
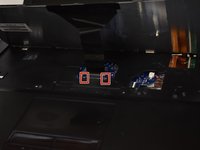
    • Turn the computer over again and press down on the metal notch. This will push the keyboard out of its place.

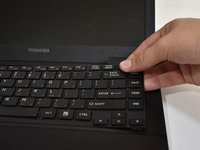
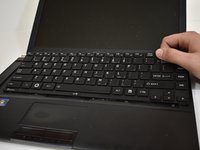
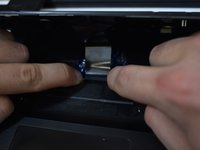
    • Once you can get a firm grasp on the keyboard make small motions side to side and pull it out of place.

    • The top and right side of the keyboard should be out when you grab it, so to slide it out pull in the direction away from the lower left corner.

    • Make sure not to pull to hard as there is one last connection under the keyboard that could be severed.

  15. Toshiba TECRA R940 Keyboard Replacement: шаг 15, изображение 1 из 2 Toshiba TECRA R940 Keyboard Replacement: шаг 15, изображение 2 из 2
    • Push the two tan brackets towards the back of the computer, and safely pull out the connector ribbon.

Заключение

To reassemble your device, follow these instructions in reverse order.

Jack Dutton

Участник с: 09/23/18

389 Репутация

Автор 3 руководств

Команда

Central Washington University, Team S1-G5, Pengilly Fall 2018 Участник Central Washington University, Team S1-G5, Pengilly Fall 2018

CWU-PENGILLY-F18S1G5

3 членов

Автор 21 руководств

2 Комментариев

To replace the keyboard you only need to remove one screw (marked KB) on the underside of the laptop. The keyboard can then be easily removed by taking off the plastic bezel by the top row of keys and unclipping from there. Literally a 5 minute job without the need to fully disassemble.

cannysnokia - Ответить

Bravo! You are 100% right

Thanks to your advice, I got rid of unnecessary and unnecessary disassembly work.

Evgeny Johansen -

Добавить комментарий

Просмотр статистики:

За последние 24часов: 1

За последние 7 дней: 2

За последние 30 дней: 24

За всё время: 2,190