
iMac Intel 21.5" EMC 2428 Hard Drive Replacement

Введение
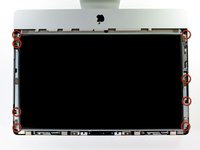
Перейти к шагу 1Upgrade your hard drive for an increase in storage space.
This guide also includes steps to upgrade your iMac's hard drive with a SSD. It describes how to install the SSD's temperature sensor so that the Mac's fans will operate at the correct speed.
Before beginning any work on your iMac: Unplug the computer and press and hold the power button for ten seconds to discharge the power supply's capacitors.
Be very careful not to touch the capacitor leads or any exposed solder joints on the back of the power supply.
Выберете то, что вам нужно
Ремонтный комплект
Этот комплект содержит все детали и инструменты, используемые в руководстве.

Запчасти


Инструменты


Показать больше…
-
Инструмент, используемый на этом этапе:Heavy-Duty Suction Cups (Pair)$14.95
-
Stick a suction cup near each of the two top corners of the glass panel.
-
If your suction cups refuse to stick, try cleaning both the glass panel and the suction cup with a mild solvent.
-
-
-
Gently lift the glass panel perpendicular to the face of the LCD enough to clear the steel mounting pins attached along the underside of the top edge of the glass panel.
-
Pull the glass panel away from the lower edge of the iMac and carefully set it aside.
-
-
-
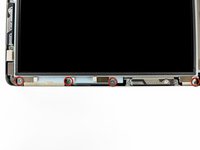
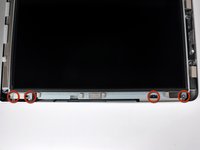
Remove the eight 8 mm T10 Torx screws securing the display to the outer case.
-
-
-
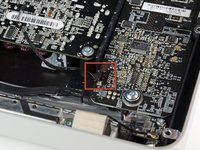
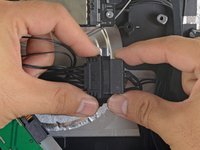
Pull the vertical sync cable connector out of its socket on the LED driver board near the top left corner of your iMac.
-
-
-
Rotate the display out of the outer case enough to disconnect the LED backlight power cable from the LED driver board.
-
-
-
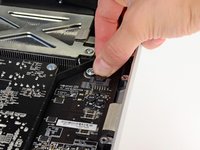
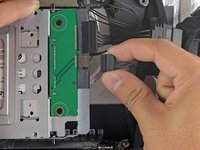
Grab the plastic pull tab secured to the display data cable lock and rotate it towards upwards.
-
Pull the display data cable straight out of its socket on the logic board.
-
-
-
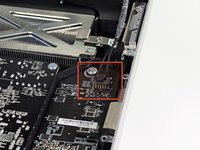
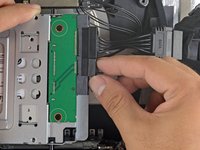
Disconnect the LCD thermal sensor cable connector from its socket on the logic board.
-
-
-
Carefully pull the display toward the top edge of your iMac and lift it out of the outer case, minding any cables that may get caught.
-
-
-
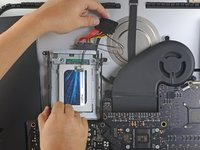
Remove the two 9 mm T10 Torx screws securing the upper hard drive bracket to the outer case.
-
-
-
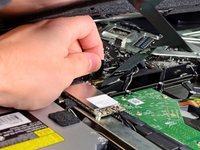
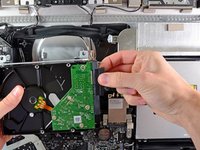
Slightly rotate the hard drive out of the outer case and lift it up off its mounting pins toward the top edge of the iMac.
-
-
-
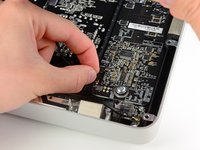
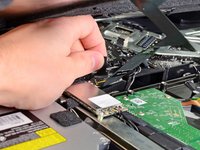
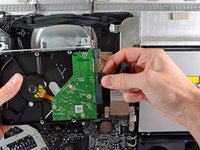
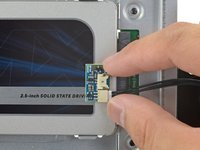
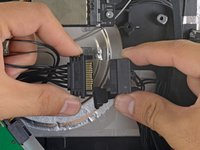
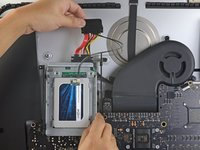
Disconnect the SATA data cable and SATA power connector from their respective sockets by pulling each connector away from the hard drive.
-
-
-
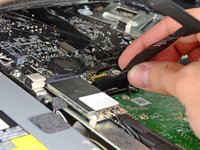
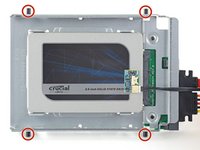
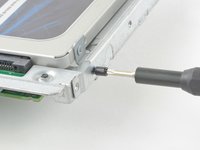
Remove the two T8 Torx screws securing the upper bracket to the hard drive.
-
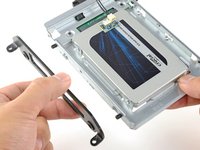
Remove the upper bracket from the hard drive.
-
-
-
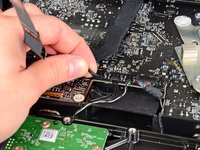
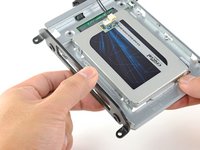
Carefully peel off the piece of EMI foam attached to the front of the hard drive.
-
-
-
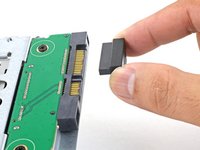
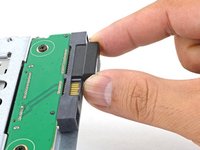
Line up the SSD connectors with the metal enclosure's sockets.
-
Press the drive against the enclosure sockets until the SSD is firmly seated.
-
-
-
Use a Phillips screwdriver to install the four silver screws (two on each side) along the edges of the SSD to secure it to the enclosure.
-
-
-
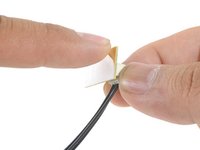
Peel the white liner off the back of the small temperature sensor board in order to expose the adhesive.
-
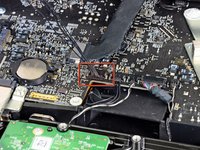
Adhere the temperature sensor board to an exposed, metal surface of the SSD, close to the SATA connector.
-
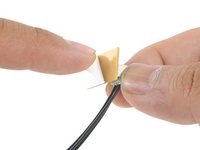
Fold the excess temperature sensor wires so that they are out of the way while you install the enclosure.
-
-
-
Use a T8 driver to install the mounting pins from the old hard drive onto the sides of the enclosure.
-
-
-
Attach any mounting brackets removed from the old hard drive onto the enclosure.
-
-
-
Connect the iMac's SATA power cable to the other end of the new sensor-enabled SATA cable.
-
-
-
Slide the SSD enclosure into the space previously occupied by the hard drive.
-
Route the SATA cables so that they will not interfere with any other components.
-


To reassemble your device, follow these instructions in reverse order.
To reassemble your device, follow these instructions in reverse order.
Отменить: Я не выполнил это руководство.
314 человек успешно провели ремонт по этому руководству.

80 Комментариев
Hi guys, the tools arrived today and I did already chage the default harddisk against the WD Velociraptor 500GB. For now everything is working fine. The iMac is in the middle of restoring the time maschine backup. Everything worked out as described. Excellent! I was just a little surprised by the magnetic forces which one needs to overcome gently...
Is there a temp sensor that monitors the HD? I did the upgrade but now my fan is always on. I must've done something wrong.
Did you use the same brand hard drive? Did check the instructions about cable orientation on the hard drive? Did you double check the LCD thermal sensor cable?
Take a glance at this page for full explanations:
http://www.hddfancontrol.com/imac-hard-d...
I had the same issue here (after replacing the original HDD by a 1TB WB Caviar Blue) and it has been fixed by this utility.
HTH,
In response to the software, that does work, however, it can be taken care of hardware wise if our recommendations are followed.