Перейти к основному содержанию
/
Мой рабочий стол для верстки руководств

Получите быстрый доступ к руководствам, запчастям и ответам касательно ваших устройств

Remplacement de la carte mère de l'iPad Air Wi-Fi

Примечание: Вы редактируете необходимое руководство. Любые внесённые вами изменения влияют на все 8 руководства, которые включают этот шаг.

Английский
Французский
Шаг 22
iPad Air Wi-Fi Logic Board Replacement: шаг 0, изображение 1 из 3 iPad Air Wi-Fi Logic Board Replacement: шаг 0, изображение 2 из 3 iPad Air Wi-Fi Logic Board Replacement: шаг 0, изображение 3 из 3
  • In the next steps, you will use an iOpener to apply heat to the rear case of the iPad to soften adhesive holding the logic board in place.

  • As you reheat and place the iOpener in each of the indicated locations, leave it in place for at least a minute to soften the adhesive through the rear case.

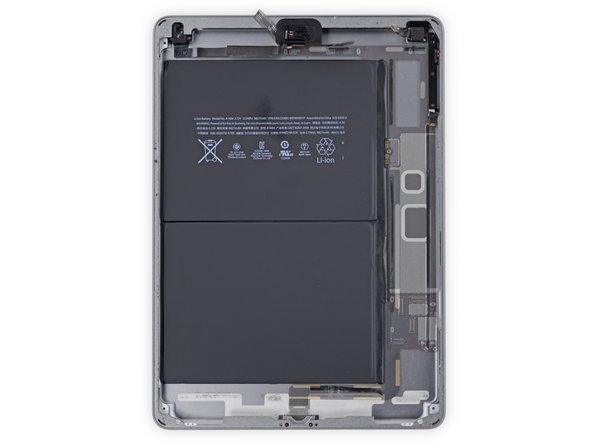
  • The adhesive is in the form of six pieces of black foam tape—refer to this step as you work at heating and prying to keep track of where each piece is located.

Dans les prochaines étapes, vous utiliserez un iOpener pour chauffer la coque arrière de l'iPad et ramollir l'adhésif maintenant la carte mère en place.

Lorsque vous réchauffez et placez l'iOpener à chacun des emplacements indiqués, laissez-le en place pendant au moins une minute pour ramollir l'adhésif à travers la coque.

L'adhésif se présente sous la forme de six morceaux de mousse adhésive noire – reportez-vous à cette étape pendant que vous vous occupez de réchauffer et décoller, pour savoir où se trouve chaque morceau.

Ваш вклад лицензируется под свободной лицензией Creative Commons .