Этот перевод был сделан машиной и пока не проверен человеком. Говорите на этом языке? Просмотрите его.
Этот перевод может не содержать последние обновления исходного руководства. Помогите обновить перевод или просмотреть исходное руководство.
Введение
Используйте это руководство, чтобы снять или заменить радиатор в вашей Nintendo Switch Lite.
В Nintendo Switch Lite используются винты JIS, но в крайнем случае можно воспользоваться крестовой отверткой (Phillips). Будьте очень осторожны, чтобы не сорвать шлицы винтов. Биты Phillips от iFixit разработаны с учетом совместимости с винтами типа JIS.
Примечание: Эта процедура требует снятия защитной пластины и радиатора. С обоих компонентов, а также с центрального процессора, необходимо очистить старую термопасту и нанести новую перед установкой защитной пластины и радиатора на место.
Выберете то, что вам нужно
-
-
Инструмент, используемый на этом этапе:Magnetic Project Mat$19.95
-
Используйте отвертку Y00, чтобы открутить четыре винта длиной 6,3 мм, удерживающие заднюю панель.
 Спросите у FixBot
-
-
-
Используйте отвертку JIS 000 или отвертку iFixit PH 000, чтобы выкрутить следующие винты, удерживающие заднюю панель:
-
Два винта длиной 3,6 мм в верхней части устройства
-
Два винта длиной 3,6 мм в нижней части устройства
-
-
-
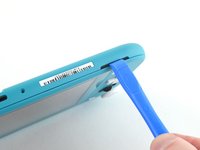
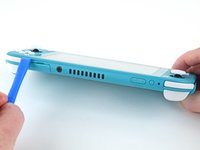
Вставьте инструмент для вскрытия в левую решетку динамика в нижней части устройства.
-
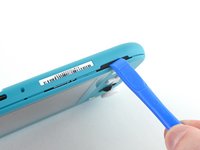
Поверните инструмент для вскрытия, чтобы освободить защелки, удерживающие заднюю панель.
-
-
-
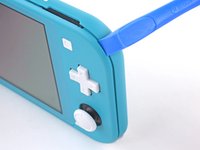
Проведите инструментом для открывания вдоль нижнего левого угла, чтобы освободить защелки на левой стороне устройства.
-
-
-
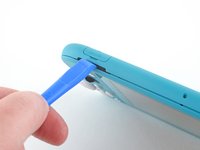
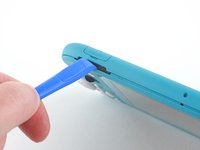
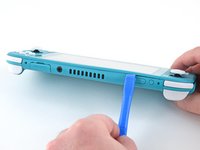
Вставьте инструмент для вскрытия в правую решетку динамика в нижней части устройства.
-
Поверните инструмент для вскрытия, чтобы отстегнуть фиксаторы.
-
-
-
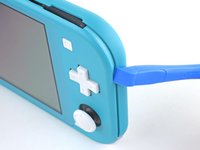
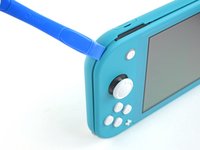
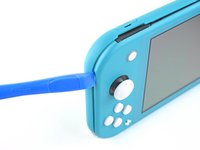
Сдвиньте инструмент для открывания и подденьте нижний правый угол, чтобы освободить фиксаторы на правой стороне устройства.
-
-
-
-
Продолжайте продвигать и поддевать инструмент для вскрытия вдоль зазора в верхней части устройства, чтобы освободить защелки.
-
-
-
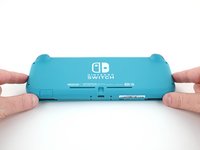
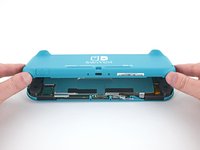
Приподнимите нижний край задней панели и откройте ее, как книгу.
-
Снимите заднюю панель.
-
-
-
-
-
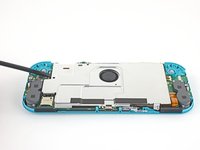
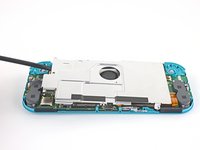
С помощью отвертки JIS 000 или отвертки PH 000 от iFixit выкрутите четыре винта, крепящие защитную пластину:
-
Три винта длиной 3,1 мм
-
Один винт длиной 4,5 мм
-
-
-
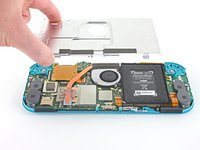
Используйте пластиковую лопатку (spudger) или пальцы, чтобы приподнять и извлечь защитную пластину из устройства.
-
Снимите защитную пластину.
-
-
-
-
-
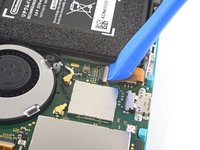
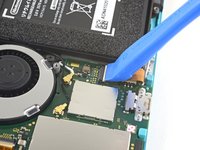
Используйте пластиковый медиатор или ноготь, чтобы поднять небольшой откидной фиксатор на разъеме ZIF соединительного шлейфа материнской платы.
-
-
-
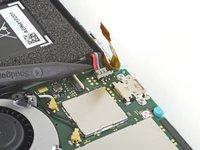
Используйте пинцет с нейлоновыми или керамическими наконечниками, чтобы выдвинуть соединительный шлейф из разъема на материнской плате.
-
-
-
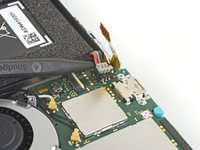
Используйте кончик лопатки (spudger), чтобы поддеть разъем аккумулятора и вытянуть его вверх из гнезда на материнской плате.
-
-
-
-
-
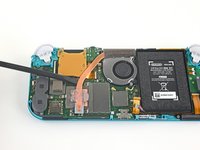
Плоским концом антистатической лопатки или пальцами аккуратно отклейте поролон, который слегка приклеен к вентилятору.
-
-
-
Используйте отвертку JIS 000 или отвертку iFixit PH 000, чтобы открутить три винта длиной 3 мм, удерживающие радиатор на материнской плате.
-
-
-
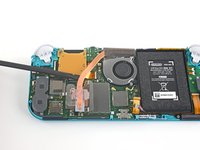
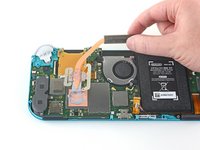
Используйте пластиковую лопатку (spudger) или пальцы, чтобы приподнять и снять радиатор с материнской платы.
-
-




















Для сборки устройства выполните эти инструкции в обратном порядке.
Сдайте электронные отходы в сертифицированный пункт переработки (R2 или e-Stewards).
Ремонт пошел не по плану? Попробуйте обратиться за помощью к сообществу Answers для Nintendo Switch Lite или выполните базовую диагностику.
Отменить: Я не выполнил это руководство.
7 человек успешно провели ремонт по этому руководству.

1 Комментарий к руководству
What kind of thermal paste should I use and should it be conductive or non conductive?
