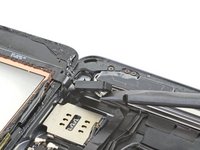
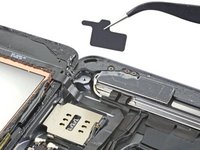
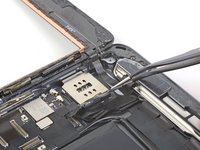
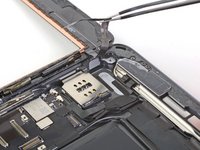
Перейти к основному содержанию
Присоединяйся к сообществу ремонтников - Создай аккаунт

iPad 9 LTE Button Control Cable Replacement

Выберете то, что вам нужно

  1. iPad 9  LTE Button Control Cable Replacement, Heat the left edge: шаг 1, изображение 1 из 1
    • Power down your iPad before beginning the repair.

    • Heat an iOpener and apply it to the left edge of the iPad for two minutes.

    Спросите у FixBot
  2. iPad 9  LTE Button Control Cable Replacement, Screen removal information: шаг 2, изображение 1 из 3 iPad 9  LTE Button Control Cable Replacement, Screen removal information: шаг 2, изображение 2 из 3 iPad 9  LTE Button Control Cable Replacement, Screen removal information: шаг 2, изображение 3 из 3
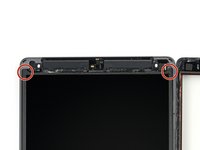
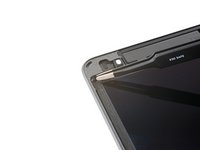
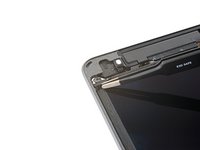
    • While you're waiting for the adhesive to loosen, note the following areas that are sensitive to prying:

    • Front camera

    • Ambient light sensors

    • Antennas

    • Display cables

    Спросите у FixBot
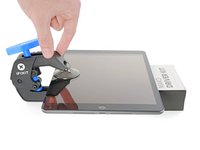
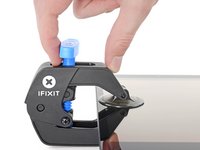
  3. iPad 9  LTE Button Control Cable Replacement, Anti-Clamp instructions: шаг 3, изображение 1 из 3 iPad 9  LTE Button Control Cable Replacement, Anti-Clamp instructions: шаг 3, изображение 2 из 3 iPad 9  LTE Button Control Cable Replacement, Anti-Clamp instructions: шаг 3, изображение 3 из 3
    Инструмент, используемый на этом этапе:
    Clampy - Anti-Clamp
    $24.95
    • The next three steps demonstrate the Anti-Clamp, a tool we designed to make the opening procedure easier. If you aren't using the Anti-Clamp, skip down three steps for an alternate method.

    • For complete instructions on how to use the Anti-Clamp, check out this guide.

    • Pull the blue handle backwards to unlock the Anti-Clamp's arms.

    • Place an object under your iPad so it rests level between the suction cups.

    • Position the suction cups near the middle of the left edge—one on the top, and one on the bottom.

    • Hold the bottom of the Anti-Clamp steady and firmly press down on the top cup to apply suction.

    • If you find that the surface of your iPad is too slippery for the Anti-Clamp to hold onto, use tape to create a grippier surface.

    Спросите у FixBot
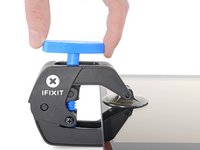
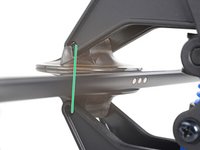
  4. iPad 9  LTE Button Control Cable Replacement: шаг 4, изображение 1 из 3 iPad 9  LTE Button Control Cable Replacement: шаг 4, изображение 2 из 3 iPad 9  LTE Button Control Cable Replacement: шаг 4, изображение 3 из 3
    • Pull the blue handle forward to lock the arms.

    • Turn the handle clockwise 360 degrees or until the cups start to stretch.

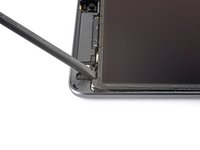
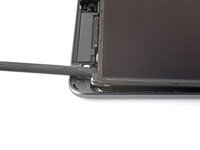
    • Make sure the suction cups remain aligned with each other. If they begin to slip out of alignment, loosen the suction cups slightly and realign the arms.

    Спросите у FixBot
  5. iPad 9  LTE Button Control Cable Replacement: шаг 5, изображение 1 из 2 iPad 9  LTE Button Control Cable Replacement: шаг 5, изображение 2 из 2
    • Wait one minute to give the adhesive a chance to release and present an opening gap.

    • If your screen isn't getting hot enough, you can use a hair dryer to heat along the left edge of the iPad.

    • For complete instructions on how to use a hair dryer, check out this guide.

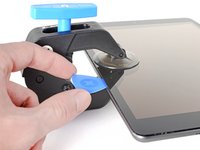
    • Insert an opening pick under the digitizer when the Anti-Clamp creates a large enough gap.

    • If the Anti-Clamp doesn't create a sufficient gap, apply more heat to the area and rotate the handle clockwise half a turn.

    • Don't crank more than a half a turn at a time, and wait one minute between turns. Let the Anti-Clamp and time do the work for you.

    • Skip the next step.

    Спросите у FixBot
  6. iPad 9  LTE Button Control Cable Replacement, Insert an opening pick: шаг 6, изображение 1 из 3 iPad 9  LTE Button Control Cable Replacement, Insert an opening pick: шаг 6, изображение 2 из 3 iPad 9  LTE Button Control Cable Replacement, Insert an opening pick: шаг 6, изображение 3 из 3
    • If your display is badly cracked, covering it with a layer of clear packing tape may allow the suction cup to adhere. Alternatively, very strong tape may be used instead of the suction cup. If all else fails, you can superglue the suction cup to the broken screen.

    • Once the screen is warm to touch, apply a suction handle to the left edge of the screen and as close to the edge as possible.

    • Lift the screen with the suction handle to create a small gap between the digitizer and the frame.

    • Insert an opening pick into the gap between the digitizer and the frame.

    Спросите у FixBot
  7. iPad 9  LTE Button Control Cable Replacement, Separate the left adhesive: шаг 7, изображение 1 из 3 iPad 9  LTE Button Control Cable Replacement, Separate the left adhesive: шаг 7, изображение 2 из 3 iPad 9  LTE Button Control Cable Replacement, Separate the left adhesive: шаг 7, изображение 3 из 3
    • Insert a second opening pick into the gap you just created.

    • Slide the pick toward the bottom-left corner of the iPad to separate the adhesive.

    • Leave the pick in the bottom-left corner to prevent the adhesive from re-sealing.

    • Don't worry if you can see the opening pick through the digitizer—just pull the pick out. The LCD screen shouldn't be damaged, but you risk leaving behind hard-to-clean adhesive.

    Спросите у FixBot
  8. iPad 9  LTE Button Control Cable Replacement: шаг 8, изображение 1 из 3 iPad 9  LTE Button Control Cable Replacement: шаг 8, изображение 2 из 3 iPad 9  LTE Button Control Cable Replacement: шаг 8, изображение 3 из 3
    • If the opening pick gets stuck in the adhesive, "roll" the pick along the side of the iPad to continue separating the adhesive.

    Спросите у FixBot
  9. iPad 9  LTE Button Control Cable Replacement: шаг 9, изображение 1 из 3 iPad 9  LTE Button Control Cable Replacement: шаг 9, изображение 2 из 3 iPad 9  LTE Button Control Cable Replacement: шаг 9, изображение 3 из 3
    • Slide the first opening pick towards to top-left corner of the iPad to separate the adhesive.

    • Leave the pick in the top-left corner to prevent the adhesive from re-sealing.

    Спросите у FixBot
  10. iPad 9  LTE Button Control Cable Replacement, Heat the top edge: шаг 10, изображение 1 из 1
    • Heat an iOpener and apply it to the top edge of the iPad for two minutes.

    Спросите у FixBot
  11. iPad 9  LTE Button Control Cable Replacement, Separate the top left adhesive: шаг 11, изображение 1 из 3 iPad 9  LTE Button Control Cable Replacement, Separate the top left adhesive: шаг 11, изображение 2 из 3 iPad 9  LTE Button Control Cable Replacement, Separate the top left adhesive: шаг 11, изображение 3 из 3
    • Rotate the pick around the top-left corner of the iPad to separate the adhesive.

    • Only insert the pick up to 7 mm to avoid damaging the ambient light sensor.

    Спросите у FixBot
  12. iPad 9  LTE Button Control Cable Replacement, Separate the top adhesive: шаг 12, изображение 1 из 3 iPad 9  LTE Button Control Cable Replacement, Separate the top adhesive: шаг 12, изображение 2 из 3 iPad 9  LTE Button Control Cable Replacement, Separate the top adhesive: шаг 12, изображение 3 из 3
    • Slide the opening pick along the top edge of the iPad, stopping just before you reach the front camera.

    • Avoid sliding the pick over the front camera, as you may damage the lens. The following steps will show how to prevent this.

    Спросите у FixBot
  13. iPad 9  LTE Button Control Cable Replacement: шаг 13, изображение 1 из 3 iPad 9  LTE Button Control Cable Replacement: шаг 13, изображение 2 из 3 iPad 9  LTE Button Control Cable Replacement: шаг 13, изображение 3 из 3
    • Pull the pick out until only the tip is between the digitizer and the frame.

    • Slide the pick above the front camera to separate the adhesive.

    • Leave the pick near the right side of the front camera before continuing.

    Спросите у FixBot
  14. iPad 9  LTE Button Control Cable Replacement: шаг 14, изображение 1 из 3 iPad 9  LTE Button Control Cable Replacement: шаг 14, изображение 2 из 3 iPad 9  LTE Button Control Cable Replacement: шаг 14, изображение 3 из 3
    • Re-insert the pick and slide it towards the top-right corner of the iPad to completely separate the top adhesive.

    • Leave the pick in the top-right corner to prevent the adhesive from re-sealing.

    Спросите у FixBot
  15. iPad 9  LTE Button Control Cable Replacement, Heat the right edge: шаг 15, изображение 1 из 1
    • Heat an iOpener and apply it to the right edge of the iPad for two minutes.

    Спросите у FixBot
  16. iPad 9  LTE Button Control Cable Replacement, Separate the top right adhesive: шаг 16, изображение 1 из 3 iPad 9  LTE Button Control Cable Replacement, Separate the top right adhesive: шаг 16, изображение 2 из 3 iPad 9  LTE Button Control Cable Replacement, Separate the top right adhesive: шаг 16, изображение 3 из 3
    • Rotate the pick around the top-right corner of the iPad to separate the adhesive.

    • Only insert the pick up to 4 mm to avoid damaging the ambient light sensor.

    Спросите у FixBot
  17. iPad 9  LTE Button Control Cable Replacement, Separate the right adhesive: шаг 17, изображение 1 из 3 iPad 9  LTE Button Control Cable Replacement, Separate the right adhesive: шаг 17, изображение 2 из 3 iPad 9  LTE Button Control Cable Replacement, Separate the right adhesive: шаг 17, изображение 3 из 3
    • Insert a new opening pick and slide it to the middle of the iPad's right edge.

    • The display cables are located approximately halfway from the bottom of the iPad. Stop sliding once you reach three inches from the bottom of the iPad.

    Спросите у FixBot
  18. iPad 9  LTE Button Control Cable Replacement, Heat the bottom edge: шаг 18, изображение 1 из 1
    • Heat an iOpener and apply it to the bottom edge of the iPad for two minutes.

    Спросите у FixBot
  19. iPad 9  LTE Button Control Cable Replacement, Separate the bottom left adhesive: шаг 19, изображение 1 из 3 iPad 9  LTE Button Control Cable Replacement, Separate the bottom left adhesive: шаг 19, изображение 2 из 3 iPad 9  LTE Button Control Cable Replacement, Separate the bottom left adhesive: шаг 19, изображение 3 из 3
    • Slide the bottom-left pick to the bottom-left corner to separate the adhesive.

    • Don't fully rotate the pick around the corner, as you may damage the antenna.

    • The third image shows the bottom-left antenna underneath the digitizer.

    • Leave the pick in the corner before moving to the next step.

    Спросите у FixBot
  20. iPad 9  LTE Button Control Cable Replacement, Separate the bottom adhesive: шаг 20, изображение 1 из 3 iPad 9  LTE Button Control Cable Replacement, Separate the bottom adhesive: шаг 20, изображение 2 из 3 iPad 9  LTE Button Control Cable Replacement, Separate the bottom adhesive: шаг 20, изображение 3 из 3
    • Insert a new opening pick into the gap you just created on the bottom edge of the iPad.

    • Slide the pick over the antenna, stopping just before the home button.

    • Only slide the pick towards the home button and not away from it, as you may damage the antenna.

    • If you need to slide the pick over this section again, remove and re-insert it at the bottom-left corner.

    • Leave the pick to the left of the home button before continuing.

    Спросите у FixBot
  21. iPad 9  LTE Button Control Cable Replacement: шаг 21, изображение 1 из 3 iPad 9  LTE Button Control Cable Replacement: шаг 21, изображение 2 из 3 iPad 9  LTE Button Control Cable Replacement: шаг 21, изображение 3 из 3
    • Insert an opening pick into the gap you just created.

    • Slide the pick underneath the home button and towards the bottom-right corner, making sure only the tip is between the digitizer and the frame.

    Спросите у FixBot
  22. iPad 9  LTE Button Control Cable Replacement: шаг 22, изображение 1 из 3 iPad 9  LTE Button Control Cable Replacement: шаг 22, изображение 2 из 3 iPad 9  LTE Button Control Cable Replacement: шаг 22, изображение 3 из 3
    • Re-insert the pick and slide it towards the home button to completely separate the bottom adhesive.

    • Only slide the pick towards the home button and not away from it, as you may damage the antenna.

    • If you need to slide the pick over this section again, remove and re-insert it at the bottom-right corner.

    • Leave the pick to the right of the home button before continuing.

    Спросите у FixBot
  23. iPad 9  LTE Button Control Cable Replacement, Heat the right edge: шаг 23, изображение 1 из 1
    • Heat an iOpener and apply it to the right edge of the iPad for two minutes.

    Спросите у FixBot
  24. iPad 9  LTE Button Control Cable Replacement: шаг 24, изображение 1 из 2 iPad 9  LTE Button Control Cable Replacement: шаг 24, изображение 2 из 2
    • Be very careful with this step. Take your time, ensure the adhesive is hot and soft, and make sure you separated all of the adhesive with an opening pick. Don't be afraid to stop and reheat.

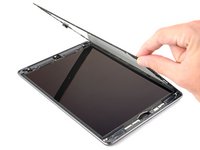
    • Twist the two opening picks on the left corners of the iPad to lift the digitizer slightly, separating the the last of the adhesive in the process.

    • If there's a significant amount of resistance, reheat the edges and work along them with an opening pick.

    Спросите у FixBot
  25. iPad 9  LTE Button Control Cable Replacement: шаг 25, изображение 1 из 2 iPad 9  LTE Button Control Cable Replacement: шаг 25, изображение 2 из 2
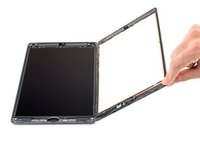
    • Lift the left edge of the digitizer upwards to further separate the adhesive along the right edge of the iPad.

    Спросите у FixBot
  26. iPad 9  LTE Button Control Cable Replacement, Separate the right adhesive: шаг 26, изображение 1 из 3 iPad 9  LTE Button Control Cable Replacement, Separate the right adhesive: шаг 26, изображение 2 из 3 iPad 9  LTE Button Control Cable Replacement, Separate the right adhesive: шаг 26, изображение 3 из 3
    Спросите у FixBot
  27. iPad 9  LTE Button Control Cable Replacement: шаг 27, изображение 1 из 2 iPad 9  LTE Button Control Cable Replacement: шаг 27, изображение 2 из 2
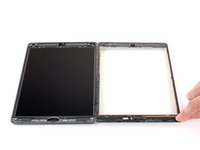
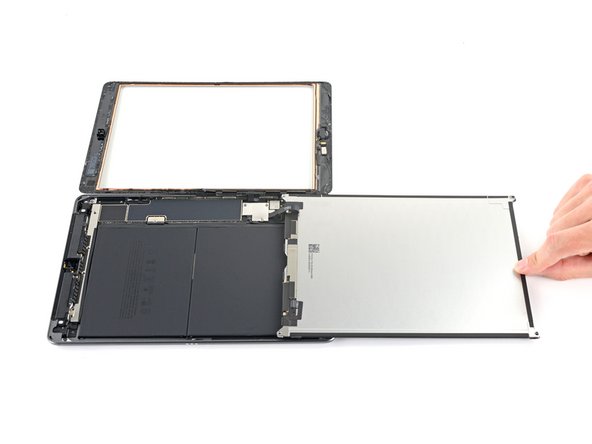
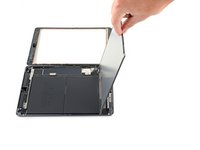
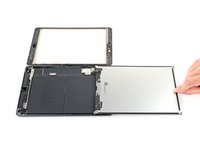
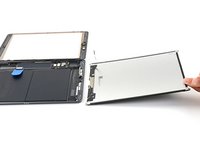
    • Once all of the adhesive has been separated, open the digitizer like a book and rest it parallel to the iPad.

    • During reassembly, clean the remaining adhesive from the frame—and the digitizer if you're re-using it—with isopropyl alcohol. Replace the adhesive with our adhesive strips or pre-cut adhesive cards.

    • Be mindful of the display cables when reassembling the iPad. Make sure they are folded properly underneath the LCD screen to prevent any damage.

    Спросите у FixBot
  28. iPad 9  LTE Button Control Cable Replacement, Remove the LCD: шаг 28, изображение 1 из 3 iPad 9  LTE Button Control Cable Replacement, Remove the LCD: шаг 28, изображение 2 из 3 iPad 9  LTE Button Control Cable Replacement, Remove the LCD: шаг 28, изображение 3 из 3
    Инструмент, используемый на этом этапе:
    Tweezers
    $4.99
    • Use tweezers, or your fingers, to remove any tape covering the LCD screws.

    Спросите у FixBot
  29. iPad 9  LTE Button Control Cable Replacement, Unfasten the LCD screen: шаг 29, изображение 1 из 2 iPad 9  LTE Button Control Cable Replacement, Unfasten the LCD screen: шаг 29, изображение 2 из 2
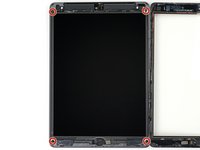
    • Use a Phillips #00 screwdriver to remove the four 4.2 mm screws securing the LCD screen.

    Спросите у FixBot
  30. iPad 9  LTE Button Control Cable Replacement, Separate the LCD's adhesive: шаг 30, изображение 1 из 2 iPad 9  LTE Button Control Cable Replacement, Separate the LCD's adhesive: шаг 30, изображение 2 из 2
    • The LCD is lightly adhered to the frame.

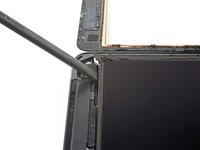
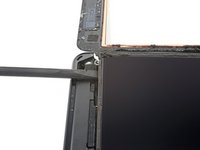
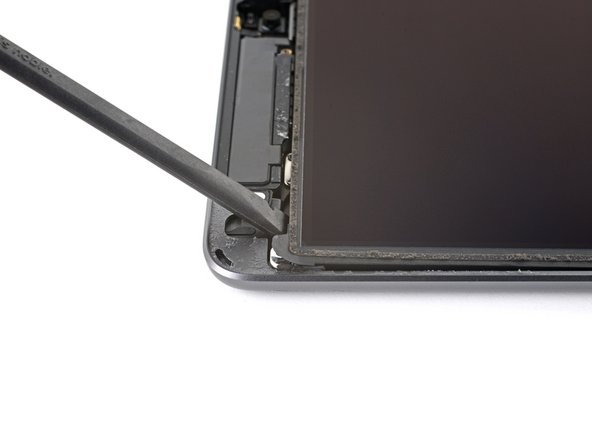
    • Insert a spudger between the frame and the top-right portion of the LCD.

    • Pry slowly with the spudger to separate the adhesive.

    Спросите у FixBot
  31. iPad 9  LTE Button Control Cable Replacement: шаг 31, изображение 1 из 2 iPad 9  LTE Button Control Cable Replacement: шаг 31, изображение 2 из 2
    • Repeat the previous step for the top-left portion of the LCD.

    Спросите у FixBot
  32. iPad 9  LTE Button Control Cable Replacement, Reposition the LCD screen: шаг 32, изображение 1 из 3 iPad 9  LTE Button Control Cable Replacement, Reposition the LCD screen: шаг 32, изображение 2 из 3 iPad 9  LTE Button Control Cable Replacement, Reposition the LCD screen: шаг 32, изображение 3 из 3
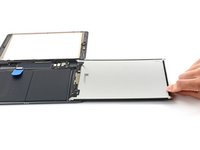
    • Don't attempt to fully remove the LCD during this step, as it's still connected by a flex cable.

    • Use the flat end of a spudger to pry the LCD out of its recess just enough to grab it with your fingers.

    • Flip the LCD like a page in a book, lifting near the camera and turning it over the home button end of the frame.

    • Lay the LCD on a clean, soft, lint-free surface to allow access to the display cables.

    Спросите у FixBot
  33. iPad 9  LTE Button Control Cable Replacement, Disconnect the battery: шаг 33, изображение 1 из 2 iPad 9  LTE Button Control Cable Replacement, Disconnect the battery: шаг 33, изображение 2 из 2
    • Use a Phillips screwdriver to remove the 2.3 mm-long screw securing the battery connector to the logic board.

    Спросите у FixBot
  34. iPad 9  LTE Button Control Cable Replacement, Battery connector information: шаг 34, изображение 1 из 3 iPad 9  LTE Button Control Cable Replacement, Battery connector information: шаг 34, изображение 2 из 3 iPad 9  LTE Button Control Cable Replacement, Battery connector information: шаг 34, изображение 3 из 3
    • These photos show what the battery connector looks like underneath the logic board. Use these photos as a reference while you safely disconnect the battery.

    • Notice that the battery connector has cantilever springs on the logic board that press against the battery contact pads. Since both the logic board and battery are glued down, you'll need to slide something thin and flexible between the contact points to disconnect the battery.

    Спросите у FixBot
  35. iPad 9  LTE Button Control Cable Replacement, Disconnect the battery: шаг 35, изображение 1 из 3 iPad 9  LTE Button Control Cable Replacement, Disconnect the battery: шаг 35, изображение 2 из 3 iPad 9  LTE Button Control Cable Replacement, Disconnect the battery: шаг 35, изображение 3 из 3
    • Be careful when you isolate the battery using a battery blocker. The battery contacts are easily bent or broken, resulting in irreversible damage.

    • Ensure that the iFixit logo on the battery blocker is facing up.

    • Slide the battery blocker underneath the logic board's battery connector at a 35 degree angle.

    • Don't push the battery blocker underneath the connector with excessive force. If you're having trouble fitting the battery blocker underneath the logic board, you can try using a playing card to disconnect the battery instead.

    • The battery blocker or playing card ideally should slide under the logic board without encountering any blockages. After insertion, it should rest at about a 15 degree angle.

    • Leave the battery blocker in place as you work.

    Спросите у FixBot
  36. iPad 9  LTE Button Control Cable Replacement, Unfasten the display cable bracket: шаг 36, изображение 1 из 2 iPad 9  LTE Button Control Cable Replacement, Unfasten the display cable bracket: шаг 36, изображение 2 из 2
    • Use a Phillips screwdriver to remove the three 1.4 mm-long screws securing the display cable bracket.

    Спросите у FixBot
  37. iPad 9  LTE Button Control Cable Replacement, Remove the display cable bracket: шаг 37, изображение 1 из 2 iPad 9  LTE Button Control Cable Replacement, Remove the display cable bracket: шаг 37, изображение 2 из 2
    • Remove the display cable bracket.

    Спросите у FixBot
  38. iPad 9  LTE Button Control Cable Replacement, Disconnect the LCD: шаг 38, изображение 1 из 2 iPad 9  LTE Button Control Cable Replacement, Disconnect the LCD: шаг 38, изображение 2 из 2
    • Use the flat end of a spudger to pry up and disconnect the LCD cable press connector.

    • To re-attach press connectors like this one, carefully align and press down on one side until it clicks into place, then repeat on the other side. Do not press down on the middle. If the connector is misaligned, the pins can bend, causing permanent damage.

    Спросите у FixBot
  39. iPad 9  LTE Button Control Cable Replacement, Remove the LCD: шаг 39, изображение 1 из 2 iPad 9  LTE Button Control Cable Replacement, Remove the LCD: шаг 39, изображение 2 из 2
    • Remove the LCD completely and rest it face down on a clean, soft, lint-free surface.

    Спросите у FixBot
  40. iPad 9  LTE Button Control Cable Replacement, Disconnect the home button: шаг 40, изображение 1 из 2 iPad 9  LTE Button Control Cable Replacement, Disconnect the home button: шаг 40, изображение 2 из 2
    Инструмент, используемый на этом этапе:
    Tweezers
    $4.99
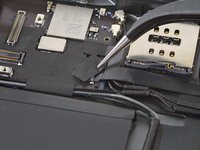
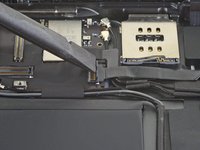
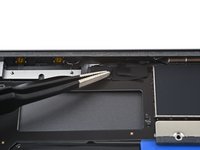
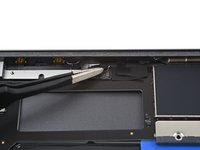
    • Use a pair of tweezers to peel off the tape covering the home button cable ZIF connector.

    Спросите у FixBot
  41. iPad 9  LTE Button Control Cable Replacement: шаг 41, изображение 1 из 2 iPad 9  LTE Button Control Cable Replacement: шаг 41, изображение 2 из 2
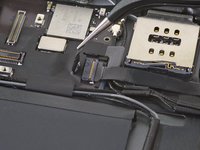
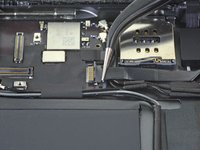
    • Use a spudger, an opening tool, or your fingernail to flip up the small, hinged locking flap on the home button cable ZIF connector.

    Спросите у FixBot
  42. iPad 9  LTE Button Control Cable Replacement: шаг 42, изображение 1 из 2 iPad 9  LTE Button Control Cable Replacement: шаг 42, изображение 2 из 2
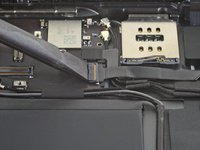
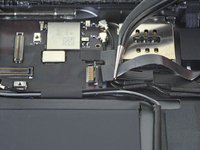
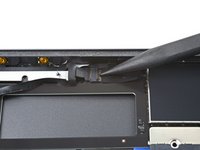
    • Use a pair of tweezers to pull the home button ribbon cable straight out of the ZIF connector.

    Спросите у FixBot
  43. iPad 9  LTE Button Control Cable Replacement, Disconnect the display cables: шаг 43, изображение 1 из 3 iPad 9  LTE Button Control Cable Replacement, Disconnect the display cables: шаг 43, изображение 2 из 3 iPad 9  LTE Button Control Cable Replacement, Disconnect the display cables: шаг 43, изображение 3 из 3
    • Use the flat end of a spudger to pry up and disconnect the two digitizer cable press connectors.

    • To avoid damaging your iPad, pry only on the connectors themselves, not on the socket on the logic board.

    Спросите у FixBot
  44. iPad 9  LTE Button Control Cable Replacement, Remove the buffer block: шаг 44, изображение 1 из 3 iPad 9  LTE Button Control Cable Replacement, Remove the buffer block: шаг 44, изображение 2 из 3 iPad 9  LTE Button Control Cable Replacement, Remove the buffer block: шаг 44, изображение 3 из 3
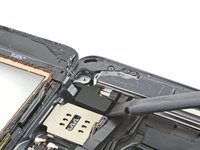
    • Use the flat end of a spudger to pry up the buffer block near the bottom-right corner of the iPad.

    • Take care not to puncture or tear the home button ribbon cable.

    • Remove the buffer block.

    Спросите у FixBot
  45. iPad 9  LTE Button Control Cable Replacement: шаг 45, изображение 1 из 3 iPad 9  LTE Button Control Cable Replacement: шаг 45, изображение 2 из 3 iPad 9  LTE Button Control Cable Replacement: шаг 45, изображение 3 из 3
    • The home button cable is secured with some light adhesive.

    • Use a pair of tweezers to peel the home button cable away from the frame.

    Спросите у FixBot
  46. iPad 9  LTE Button Control Cable Replacement, Remove the front panel assembly: шаг 46, изображение 1 из 3 iPad 9  LTE Button Control Cable Replacement, Remove the front panel assembly: шаг 46, изображение 2 из 3 iPad 9  LTE Button Control Cable Replacement, Remove the front panel assembly: шаг 46, изображение 3 из 3
    Инструмент, используемый на этом этапе:
    Polyimide Tape
    $9.95
    • Remove the front panel assembly.

    • Use an opening pick to cut away any residual adhesive that may still be connecting the front panel assembly to the frame.

    • If you experience "ghost" or "phantom" touch input issues with your new display, this can be resolved by adding a layer of very thin insulating tape, such as Kapton (polyimide) tape, to the highlighted areas on the back of the panel. iFixit replacement digitizers come with the proper insulation and should not require the addition of any tape.

    • Without the proper insulation, these areas of the digitizer can ground out against other components, causing touch input malfunction.

    • The insulation is not visible to the naked eye and is different from the foam dust barrier strips found on many iPads.

    • During reassembly, before installing a display, remove any remaining adhesive from the iPad, and clean the glued areas with high concentration isopropyl alcohol (90% or greater) and a lint-free cloth. This helps prep the iPad for fresh adhesive and ensures that it will bond properly.

    • Test your iPad's functions and install pre-cut adhesive strips to the back of the display using our display adhesive application guide before sealing it up.

    Спросите у FixBot
  47. iPad 9  LTE Button Control Cable Replacement, Remove the upper bracket tape: шаг 47, изображение 1 из 2 iPad 9  LTE Button Control Cable Replacement, Remove the upper bracket tape: шаг 47, изображение 2 из 2
    • Carefully peel the LCD buffer tape from the upper component bracket.

    Спросите у FixBot
  48. iPad 9  LTE Button Control Cable Replacement, Unfasten the upper component bracket: шаг 48, изображение 1 из 2 iPad 9  LTE Button Control Cable Replacement, Unfasten the upper component bracket: шаг 48, изображение 2 из 2
    • Use a Phillips #00 screwdriver to remove the five screws securing the the upper component bracket:

    • Three 1.4 mm-long screws

    • Two 1.9 mm-long screws

    Спросите у FixBot
  49. iPad 9  LTE Button Control Cable Replacement, Remove the upper component bracket: шаг 49, изображение 1 из 2 iPad 9  LTE Button Control Cable Replacement, Remove the upper component bracket: шаг 49, изображение 2 из 2
    • Use the pointed end of a spudger to lift up the upper component bracket until you can grip it with your fingers.

    Спросите у FixBot
  50. iPad 9  LTE Button Control Cable Replacement: шаг 50, изображение 1 из 3 iPad 9  LTE Button Control Cable Replacement: шаг 50, изображение 2 из 3 iPad 9  LTE Button Control Cable Replacement: шаг 50, изображение 3 из 3
    • Use your fingers to peel the upper component bracket away from the tape.

    • Remove the upper component bracket.

    Спросите у FixBot
  51. iPad 9  LTE Button Control Cable Replacement, Disconnect the rear camera: шаг 51, изображение 1 из 2 iPad 9  LTE Button Control Cable Replacement, Disconnect the rear camera: шаг 51, изображение 2 из 2
    • Use the flat end of a spudger to pry up and disconnect the rear camera press connector.

    Спросите у FixBot
  52. iPad 9  LTE Button Control Cable Replacement, Heat the rear camera: шаг 52, изображение 1 из 1
    • Heat an iOpener and apply it to the rear camera for thirty seconds.

    Спросите у FixBot
  53. iPad 9  LTE Button Control Cable Replacement, Remove the rear camera: шаг 53, изображение 1 из 3 iPad 9  LTE Button Control Cable Replacement, Remove the rear camera: шаг 53, изображение 2 из 3 iPad 9  LTE Button Control Cable Replacement, Remove the rear camera: шаг 53, изображение 3 из 3
    Инструмент, используемый на этом этапе:
    Tweezers
    $4.99
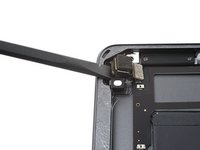
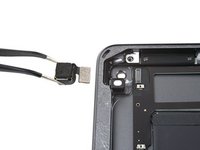
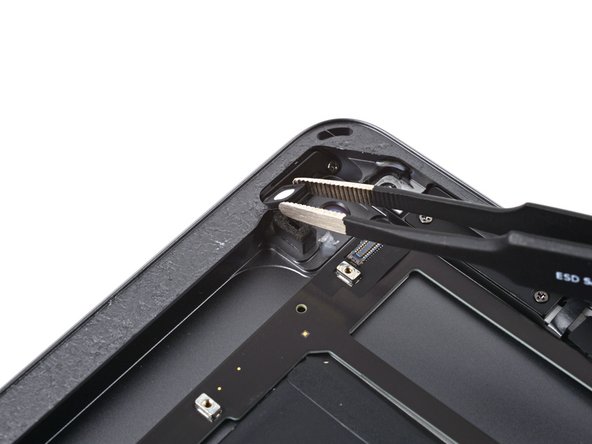
    • Use a spudger to pry the rear camera out of the frame.

    • Use tweezers, or your fingers, to remove the rear camera.

    Спросите у FixBot
  54. iPad 9  LTE Button Control Cable Replacement, Disconnect the right ambient light sensor: шаг 54, изображение 1 из 2 iPad 9  LTE Button Control Cable Replacement, Disconnect the right ambient light sensor: шаг 54, изображение 2 из 2
    Инструмент, используемый на этом этапе:
    Tweezers
    $4.99
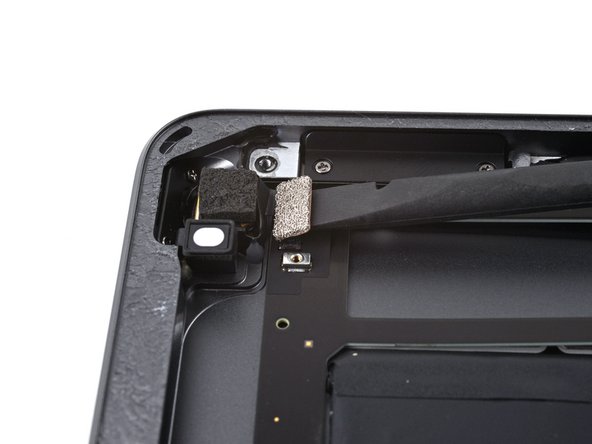
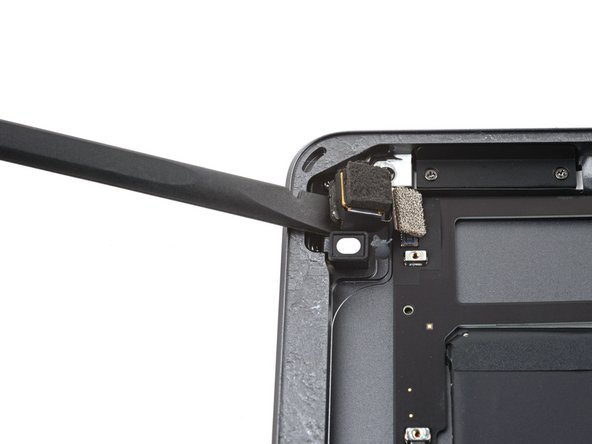
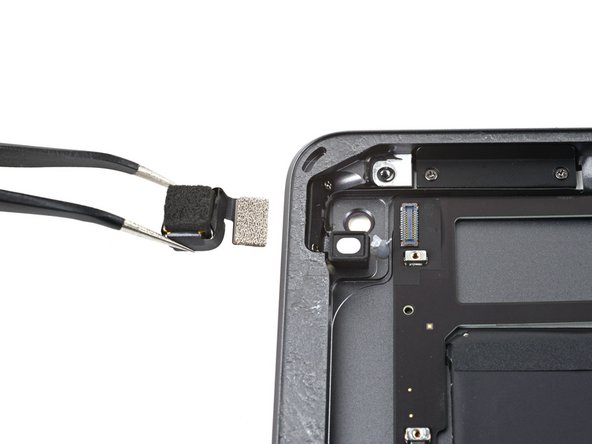
    • The right ambient light sensor is lightly adhered to the frame.

    • Use tweezers, or your fingers, to remove the sensor.

    Спросите у FixBot
  55. iPad 9  LTE Button Control Cable Replacement, Reposition the right ambient light sensor: шаг 55, изображение 1 из 2 iPad 9  LTE Button Control Cable Replacement, Reposition the right ambient light sensor: шаг 55, изображение 2 из 2
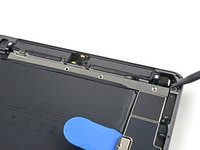
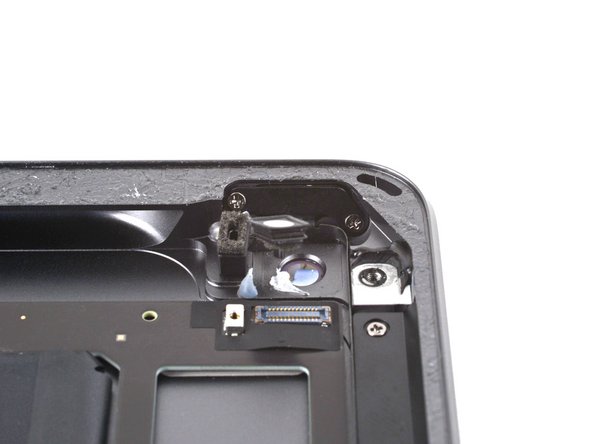
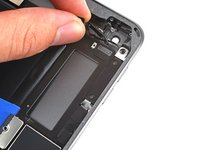
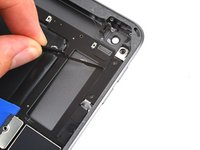
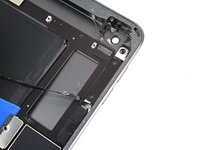
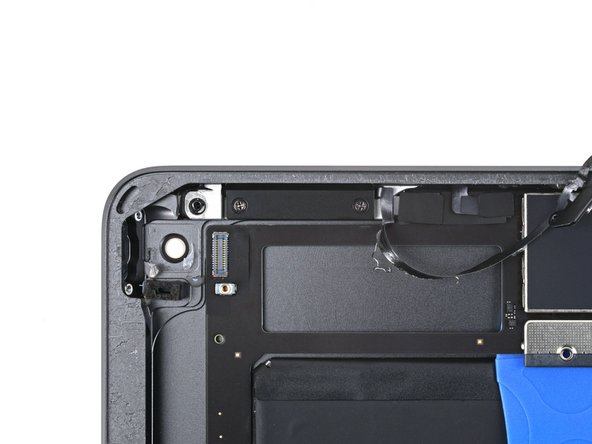
    • Peel the right ambient light sensor towards the right edge of the device, enough to access the screw behind it.

    Спросите у FixBot
  56. iPad 9  LTE Button Control Cable Replacement, Unfasten the power button bracket: шаг 56, изображение 1 из 2 iPad 9  LTE Button Control Cable Replacement, Unfasten the power button bracket: шаг 56, изображение 2 из 2
    • Use a Phillips screwdriver to remove the two 2.3 mm-long screws securing the lock button bracket.

    Спросите у FixBot
  57. iPad 9  LTE Button Control Cable Replacement, Reposition the button control cable: шаг 57, изображение 1 из 2 iPad 9  LTE Button Control Cable Replacement, Reposition the button control cable: шаг 57, изображение 2 из 2
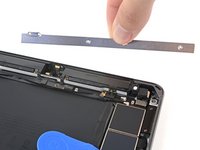
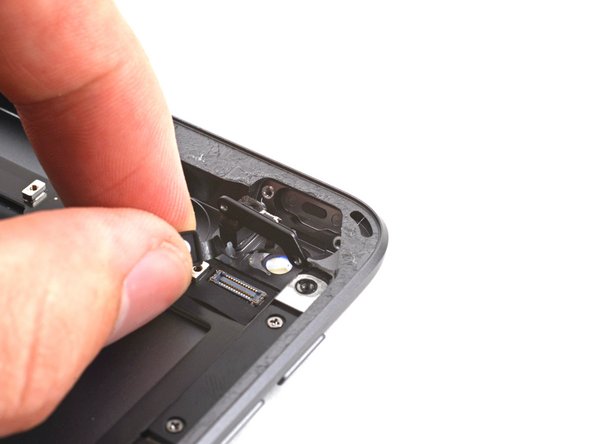
    • Use your fingers to pull the power button bracket out of its recess.

    Спросите у FixBot
  58. iPad 9  LTE Button Control Cable Replacement: шаг 58, изображение 1 из 3 iPad 9  LTE Button Control Cable Replacement: шаг 58, изображение 2 из 3 iPad 9  LTE Button Control Cable Replacement: шаг 58, изображение 3 из 3
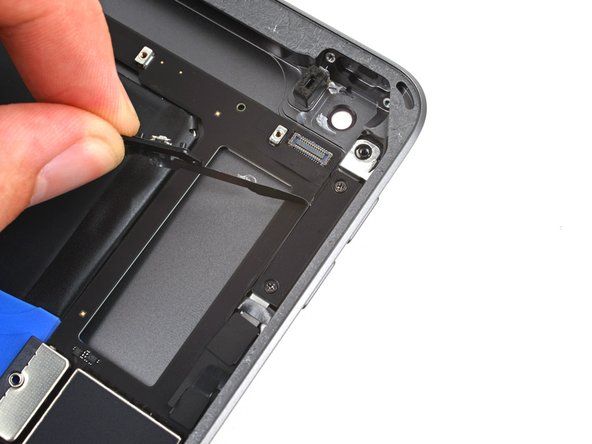
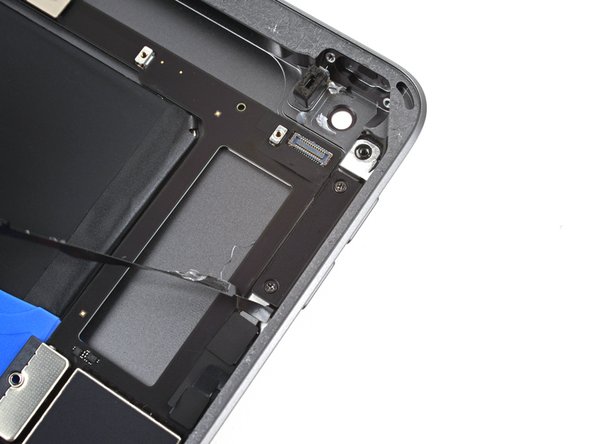
    • The button control cable is lightly adhered to the side of the volume button bracket.

    • Peel the button control cable away from the volume button bracket.

    Спросите у FixBot
  59. iPad 9  LTE Button Control Cable Replacement, Unfasten the volume button bracket: шаг 59, изображение 1 из 2 iPad 9  LTE Button Control Cable Replacement, Unfasten the volume button bracket: шаг 59, изображение 2 из 2
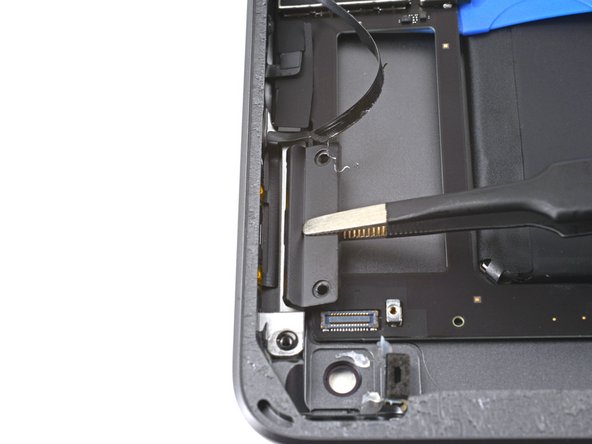
    • Use a Phillips screwdriver to remove the two 2.2 mm-long screws securing the volume button bracket to the rear case.

    Спросите у FixBot
  60. iPad 9  LTE Button Control Cable Replacement, Remove the volume button bracket: шаг 60, изображение 1 из 3 iPad 9  LTE Button Control Cable Replacement, Remove the volume button bracket: шаг 60, изображение 2 из 3 iPad 9  LTE Button Control Cable Replacement, Remove the volume button bracket: шаг 60, изображение 3 из 3
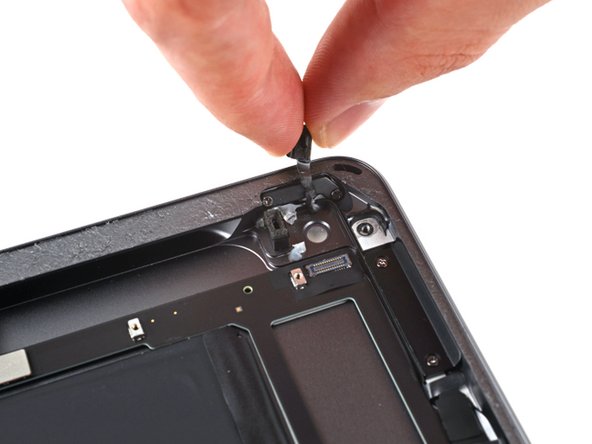
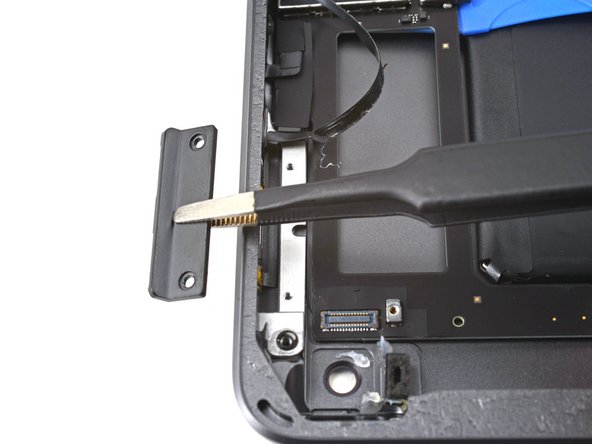
    • Use tweezers, or your fingers, to pull the volume button bracket away from the device's edge.

    • Remove the volume button bracket.

    Спросите у FixBot
  61. iPad 9  LTE Button Control Cable Replacement, Disconnect the button control cable: шаг 61, изображение 1 из 2 iPad 9  LTE Button Control Cable Replacement, Disconnect the button control cable: шаг 61, изображение 2 из 2
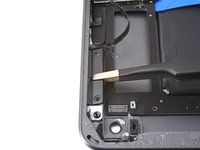
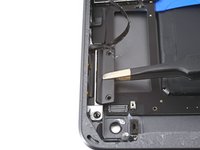
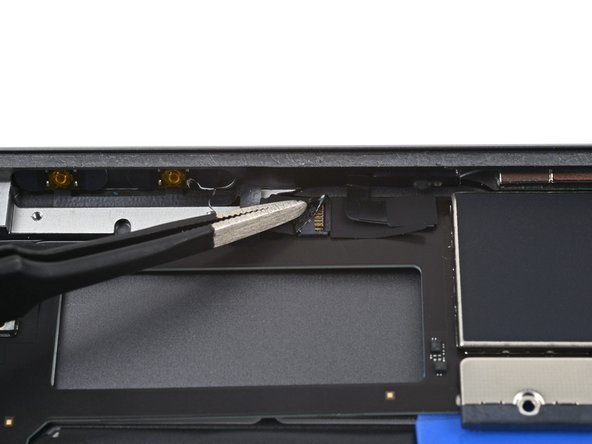
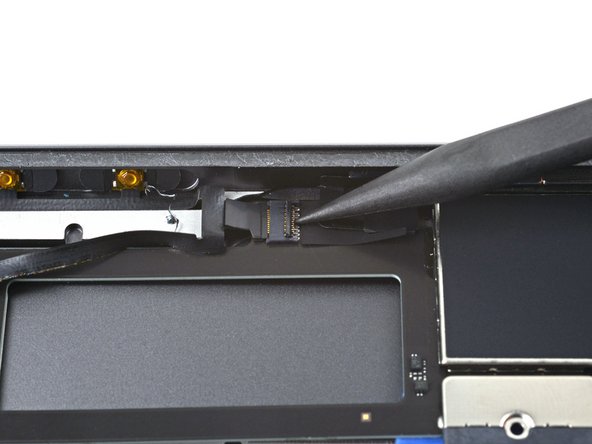
    • Peel off any tape covering the button control cable ZIF connector.

    Спросите у FixBot
  62. iPad 9  LTE Button Control Cable Replacement: шаг 62, изображение 1 из 2 iPad 9  LTE Button Control Cable Replacement: шаг 62, изображение 2 из 2
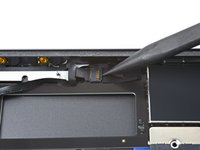
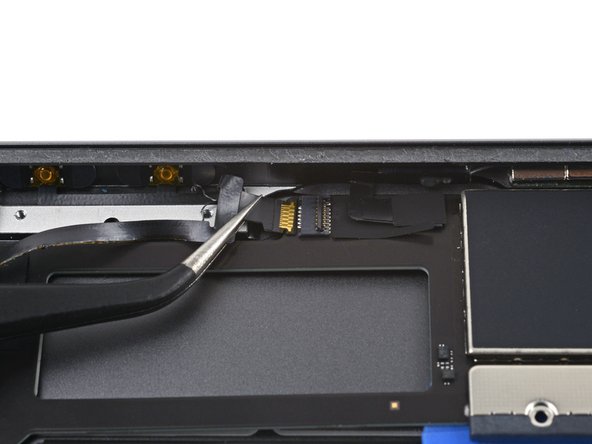
    • Use the tip of a spudger, an opening tool, or your fingernail to flip up the small, hinged locking flap on the button control cable's ZIF connector.

    Спросите у FixBot
  63. iPad 9  LTE Button Control Cable Replacement: шаг 63, изображение 1 из 2 iPad 9  LTE Button Control Cable Replacement: шаг 63, изображение 2 из 2
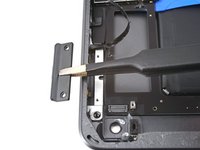
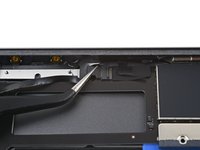
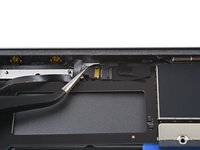
    • Use a pair of tweezers to carefully pull the button control cable straight out of the ZIF connector.

    Спросите у FixBot
  64. iPad 9  LTE Button Control Cable Replacement, Remove the button control cable: шаг 64, изображение 1 из 3 iPad 9  LTE Button Control Cable Replacement, Remove the button control cable: шаг 64, изображение 2 из 3 iPad 9  LTE Button Control Cable Replacement, Remove the button control cable: шаг 64, изображение 3 из 3
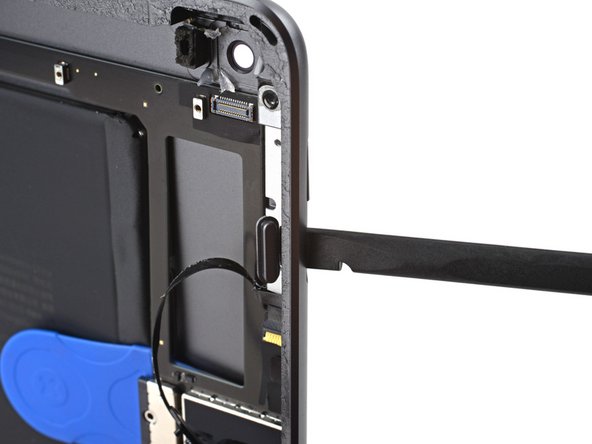
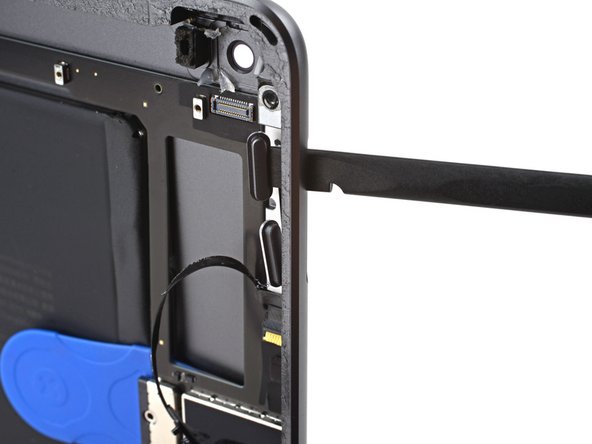
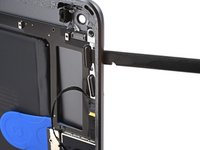
    • Use the flat end of a spudger to push the volume buttons out of their slots in the rear case.

    Спросите у FixBot
  65. iPad 9  LTE Button Control Cable Replacement, Remove the button control cable: шаг 65, изображение 1 из 2 iPad 9  LTE Button Control Cable Replacement, Remove the button control cable: шаг 65, изображение 2 из 2
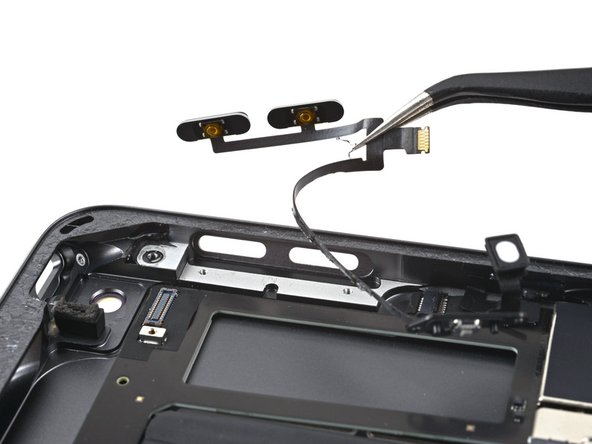
    • Remove the button control cable.

    • The lock button will become loose once the button control cable is removed.

    • Upon reassembly, remember to set the power button back into the its slot.

    Спросите у FixBot
  66. iPad 9  LTE Button Control Cable Replacement, Loosen the adhesive: шаг 66, изображение 1 из 2 iPad 9  LTE Button Control Cable Replacement, Loosen the adhesive: шаг 66, изображение 2 из 2
    • Heat an iOpener and apply it to the button control cable for thirty seconds.

    Спросите у FixBot
  67. iPad 9  LTE Button Control Cable Replacement, Remove the buttons: шаг 67, изображение 1 из 3 iPad 9  LTE Button Control Cable Replacement, Remove the buttons: шаг 67, изображение 2 из 3 iPad 9  LTE Button Control Cable Replacement, Remove the buttons: шаг 67, изображение 3 из 3
    • Use a pair of tweezers to grip the upper volume button.

    • Insert an opening pick between the volume control cable and the upper volume button.

    • Peel the volume control cable off of the upper volume button.

    Спросите у FixBot
  68. iPad 9  LTE Button Control Cable Replacement: шаг 68, изображение 1 из 3 iPad 9  LTE Button Control Cable Replacement: шаг 68, изображение 2 из 3 iPad 9  LTE Button Control Cable Replacement: шаг 68, изображение 3 из 3
    • Repeat the same process to peel the volume control cable off of the lower volume button.

    Спросите у FixBot
  69. iPad 9  LTE Button Control Cable Replacement, Remove the power button bracket: шаг 69, изображение 1 из 3 iPad 9  LTE Button Control Cable Replacement, Remove the power button bracket: шаг 69, изображение 2 из 3 iPad 9  LTE Button Control Cable Replacement, Remove the power button bracket: шаг 69, изображение 3 из 3
    Инструмент, используемый на этом этапе:
    Tesa 61395 Tape
    $8.95
    • Use a pair of tweezers to grip the power button bracket.

    • Insert a halberd spudger or opening pick between the power button bracket and the button control cable.

    • Peel the button control cable up and off of the pegs on the power button bracket.

    • Upon reassembly, apply Tesa tape to reattach the volume buttons and lock button bracket to the button control cable.

    Спросите у FixBot
  70. iPad 9  LTE Button Control Cable Replacement: шаг 70, изображение 1 из 1
    • Only the button control cable remains.

    Спросите у FixBot
Заключение

To reassemble your device, follow these instructions in reverse order.

Take your e-waste to an R2 or e-Stewards certified recycler.

Repair didn’t go as planned? Try some basic troubleshooting, or ask our iPad 9 Answers community for help.


Alex Diaz-Kokaisl

Участник с: 01/16/22

237 702 Репутация

Автор 1 171 руководств

Команда

iFixit Участник iFixit

Staff

123 членов

Автор 25 708 руководств

0 Комментарии к руководству

Добавить комментарий

Статистика просмотров:

За последние 24 часов: 1

За последние 7 дней: 4

За последние 30 дней: 49

За всё время: 950