
Xbox Series S Motherboard Replacement

Введение
Перейти к шагу 1Follow this guide to remove and replace the motherboard on a Xbox Series S.
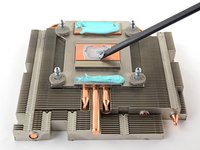
Note: When you remove the heat sink, you’ll need to replace the thermal compound between the plate and the heat sink. Since normal thermal paste isn’t designed to bridge large gaps, the closest replacement is K5 Pro viscous thermal paste. You will, however, need normal replacement thermal paste for the APU.
There are some photo discontinuities with the exterior Bluetooth, Wifi, and power boards. These discontinuities do not affect the repair procedure.
Выберете то, что вам нужно
Запчасти


Инструменты


Показать больше…
-
Инструмент, используемый на этом этапе:Tweezers$4.99
-
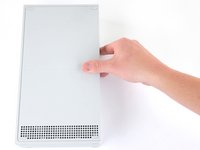
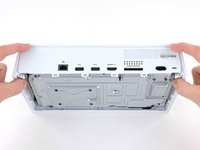
Use tweezers to peel off the two white screw covers located on the bottom corners of the back panel.
-
-
Инструмент, используемый на этом этапе:Magnetic Project Mat$19.95
-
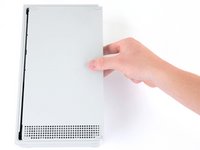
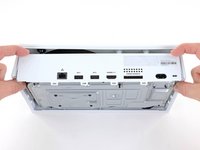
Use a T8 Torx driver to remove the two 10 mm-long screws securing the back panel to the bottom panel.
-
-
-
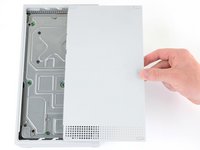
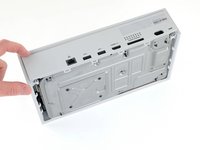
Slide the bottom panel horizontally toward the back of the console until it comes to a stop.
-
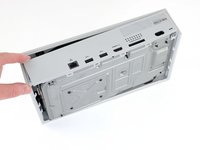
Lift straight up and remove the bottom panel from the plastic case.
-
-
-
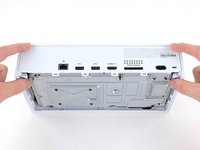
Use a T10 Torx driver to remove the seven 51 mm-long screws securing the chassis to the plastic case.
-
-
-
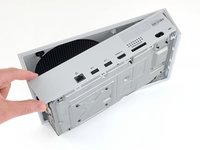
With the bottom of the Xbox facing you, pull the two bottom-rear corners of the plastic case away from each other.
-
As you pull the corners apart, slide the back panel towards the bottom of the device. This releases the back panel from the plastic case.
-
-
-
Pull the bottom-left corner away from the chassis while swinging the chassis away from the plastic case.
-
Remove the plastic case from the chassis.
-
-
-
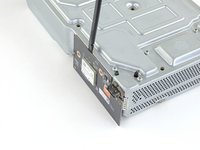
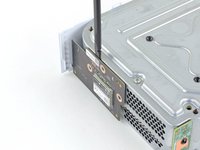
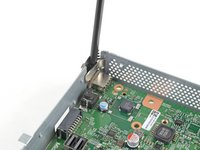
Use a T8 Torx driver to remove the three 9.5 mm-long screws securing the Bluetooth board to the long edge of the chassis.
-
-
-
Use a spudger to pry and loosen the Bluetooth board.
-
Pull the Bluetooth board straight out to disconnect it from the chassis.
-
-
-
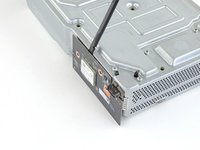
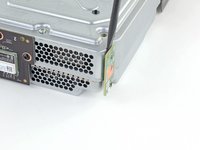
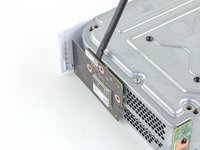
Use a T8 Torx driver to remove the 9.5 mm-long screw securing the power button board to the chassis.
-
-
-
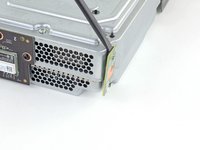
Use a spudger to pry and loosen the power button board.
-
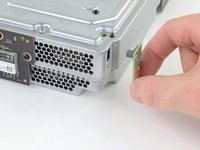
Pull the power button board straight out to disconnect it from the chassis.
-
-
-
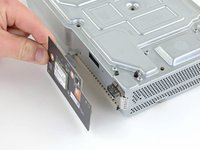
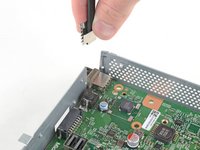
Use a T8 Torx driver to remove the three 9.5 mm-long screws securing the Wi-Fi board to the short edge of the chassis.
-
-
-
Use a spudger to pry and loosen the Wi-Fi board.
-
Pull the Wi-Fi board straight out to disconnect it from the chassis.
-
-
-
Use a T10 Torx driver to remove the seven 11.3 mm-long screws securing the power supply to the chassis.
-
-
-
Flip the device over.
-
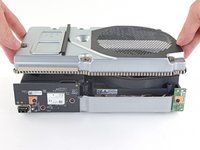
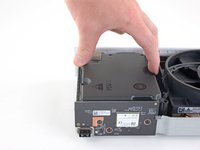
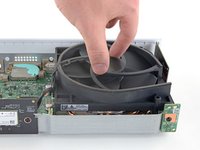
Lift the upper chassis straight up to remove it.
-
-
-
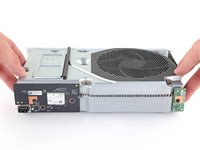
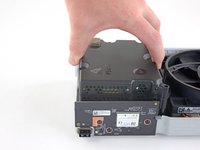
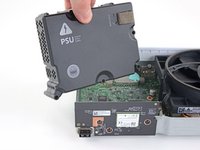
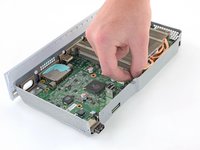
Lift the power supply straight up to disconnect it from the motherboard.
-
Remove the power supply.
-
-
-
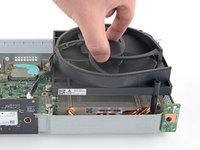
Use a T10 Torx driver to remove the two 11.3 mm-long screws securing the fan to the chassis.
-
-
-
Flip the device over.
-
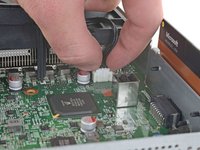
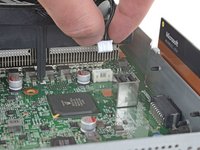
Use your fingers to pull and disconnect the fan connector from its motherboard socket.
-
-
Шаг 19 Remove the motherboard screws
Внимание: шаги 19-21 взяты из руководства, помеченного как незавершенное.
-
Use a T8 Torx driver to remove the four 9.4 mm-long screws securing the motherboard to the chassis.
-
-
-
Flip the device over.
-
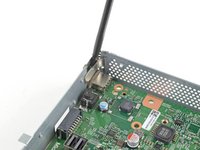
Insert a spudger into the locking clip located on the front-left corner of the chassis.
-
Lift straight up to remove the clip.
-
-
-
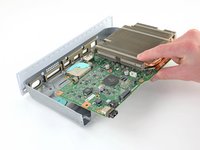
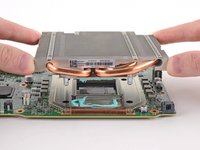
Grasp the heat sink with your fingers and lift up the front of the motherboard up above the edge of the chassis.
-
Pull the motherboard towards the front of the chassis to remove it.
-
-
-
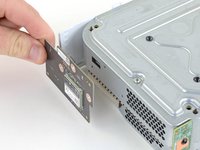
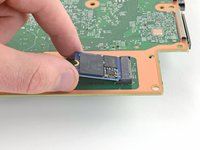
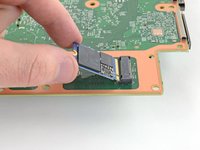
Use a T8 Torx driver to remove the 5.1 mm-long screw securing the SSD card to the motherboard.
-
-
Инструмент, используемый на этом этапе:Flathead 1.5 mm Screwdriver$5.49
-
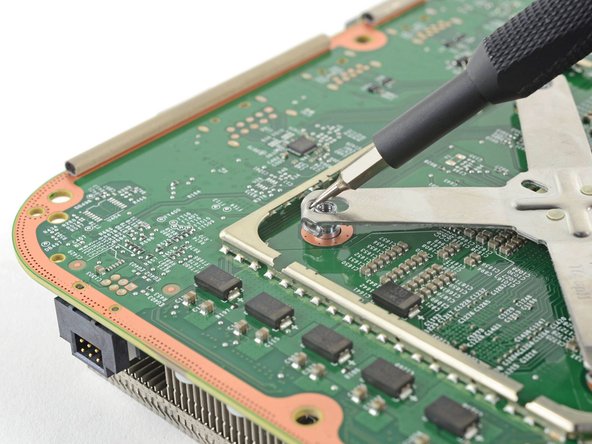
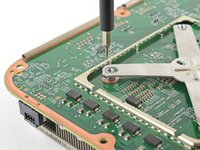
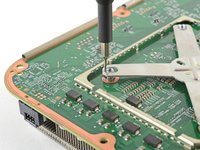
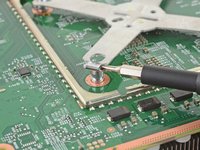
Insert a 1.5 mm flathead screwdriver from the top between the heat sink pin and the x-clamp.
-
Pry the x-clamp out and away from the heat sink pin to loosen the x-clamp.
-
-
-
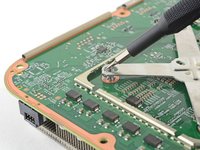
With the head parallel to the motherboard, insert a flathead screwdriver from the side between the heat sink pin and the x-clamp hook.
-
Twist the flathead screwdriver clockwise to pry the bottom edge of the x-clamp out of the groove in the heat sink pin.
-
-
-
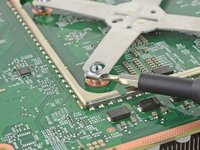
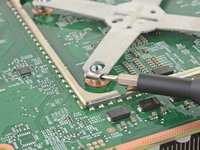
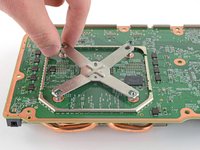
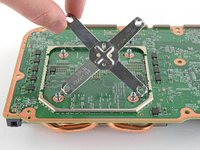
Continue to use the same technique described in the previous two steps on all of the heat sink pins until the x-clamp is disconnected.
-
-
-
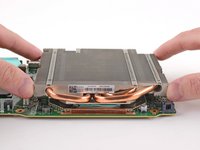
Flip the motherboard over.
-
Lift the heat sink straight up to remove it from the motherboard.
-
-
-
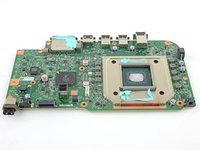
Only the motherboard remains.
-
Follow this guide for more specifics on how to reapply thermal paste to the processor and shield plate.
-


To reassemble your device, follow these instructions in reverse order.
Take your e-waste to an R2 or e-Stewards certified recycler.
Repair didn’t go as planned? Try some basic troubleshooting, or ask our Answers community for help.
To reassemble your device, follow these instructions in reverse order.
Take your e-waste to an R2 or e-Stewards certified recycler.
Repair didn’t go as planned? Try some basic troubleshooting, or ask our Answers community for help.
Отменить: Я не выполнил это руководство.
16 человек успешно провели ремонт по этому руководству.

9Комментарии к руководству
Where can I get a new motherboard and new replacement parts ? Please help