Введение
Use this guide to replace a malfunctioning power and volume button cable—this includes the switches responsible for volume up and down, the ring/silent control and the power switch, as well as a microphone and the dual-LED flash. Follow this guide if you are looking to replace the exterior power button cover and this guide for the exterior volume control button cover.
Выберете то, что вам нужно
-
-
Power off your iPhone before beginning disassembly.
-
Remove the two 3.4 mm pentalobe screws on the bottom edge of the iPhone.
-
-
-
Measure 3 mm from the tip and mark the opening pick with a permanent marker.
-
-
Инструмент, используемый на этом этапе:Clampy - Anti-Clamp$24.95
-
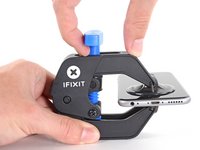
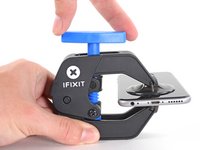
Pull the blue handle backwards to unlock the Anti-Clamp's arms.
-
Slide the arms over either the left or right edge of your iPhone.
-
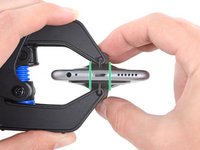
Position the suction cups near the bottom edge of the iPhone just above the home button—one on the front, and one on the back.
-
Squeeze the cups together to apply suction to the desired area.
-
-
-
Pull the blue handle forwards to lock the arms.
-
Turn the handle clockwise 360 degrees or until the cups start to stretch.
-
Make sure the suction cups remain aligned with each other. If they begin to slip out of alignment, loosen the suction cups slightly and realign the arms.
-
-
-
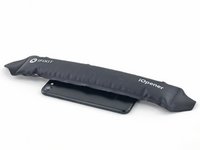
Heat an iOpener and thread it through the arms of the Anti-Clamp.
-
Fold the iOpener so it lays on the bottom edge of the iPhone.
-
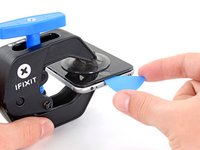
Wait one minute to give the adhesive a chance to release and present an opening gap.
-
Insert an opening pick into the gap.
-
Skip the next three steps.
-
-
-
Heating the lower edge of the iPhone will help soften the adhesive securing the display, making it easier to open.
-
Use a hairdryer or prepare an iOpener and apply it to the lower edge of the phone for about 90 seconds in order to soften up the adhesive underneath.
-
-
-
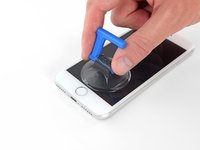
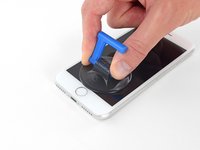
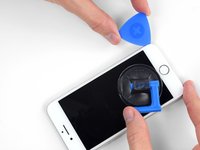
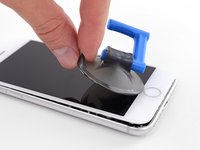
Apply a suction cup to the lower half of the front panel, just above the home button.
-
-
-
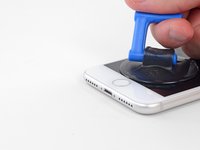
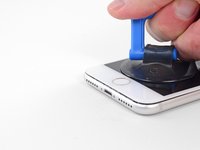
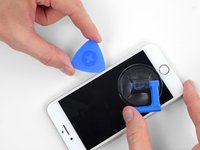
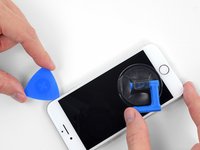
Pull up on the suction cup with firm, constant pressure to create a slight gap between the screen and the frame.
-
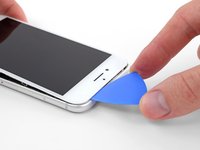
Insert an opening pick into the gap.
-
-
-
Slide the opening pick up the left edge of the phone starting at the lower edge and moving towards the volume control buttons and silent switch, breaking up the adhesive holding the display in place.
-
Stop near the top left corner of the display.
-
-
-
Re-insert your tool at the lower right corner of the iPhone, and slide it around the corner and up the right side of the phone to separate the adhesive.
-
-
-
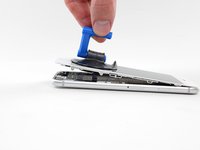
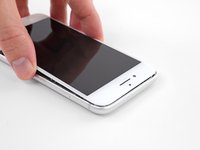
Gently pull up on the suction cup to lift up the bottom edge of the display.
-
Pull on the small nub on the suction cup to remove it from the front panel.
-
-
-
Slide an opening pick underneath the display around the top left corner and along the top edge of the phone to loosen the last of the adhesive.
-
-
-
Slide the display assembly slightly down (away from the top edge of the phone) to disengage the clips holding it to the rear case.
-
-
-
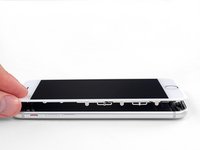
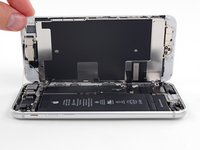
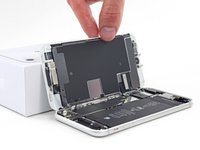
Open the iPhone by swinging the display up from the left side, like the back cover of a book.
-
Lean the display against something to keep it propped up while you're working on the phone.
-
-
Инструмент, используемый на этом этапе:Tri-point Y000 Screwdriver$5.99
-
Remove four tri-point Y000 screws securing the lower connector bracket, of the following lengths:
-
Three 1.2 mm screws
-
One 2.4 mm screw
These screws just spin for me. They don't back out, but the heads aren't stripped either. I've tried applying backpressure to help lift the screws, but no luck
What driver do I need to remove these screws i’m stuck
i cant use, the Y000 it isnt working.
What if I stripped a screw what do I do??
Yep, only the 2.4mm came out, other 3 won’t budge, and worried I’ve stripped the heads. Anyone got any ideas?
It’s the screwdriver bit that is the problem. I had the same issue with 2 Y000 bits not grabbing the screw properly. I fixed it by using a small 3 sided file to slightly grind the groves in the Y000 bit just a bit deeper. Then the bit worked like a charm on these screws.
Use Y000 on all 4. U have to be very sensitive on the 1.2mm screws. Put the bit in the screw, put the left pointing finger on top of the screwdriver and turn the driver carefully to the right until you feel a “bump”, thats the trick :-), then you are able to screw the screw out.
For me the key here was a LOT of downward pressure to ensure the Y000 bit caught in the screw. Not sure i can describe how much exactly, but is was significant. Otherwise the bit would not catch.
What do I do if I Stripped one of them?
Can’t get them removed what to do ?
Managed to get the central one out. The upper one won't move, the lower one I've popped out with some force. This allows you to rotate the cover enough to unplug the various bits. Not ideal, but works. I've tried applying a lot of pressure, using the tighten/ loosen method, but the heads have just got mashed… no wonder Samsung are now No1, sigh…
You need to be careful when just rotating the cover as you can accidentally slice through the two black antennas! You only need to nip them…As you can tell I have done this in the past :/
Filing down the bit worked for me. The tip about putting an index finger on the end of the screwdriver handles and then turning gently until it clicks into place was very helpful! Using these 2 tips I didn't need much downward pressure. Screws are out in a few turns.
Mine came out easily. I placed the screws in the area where the bit goes in my kit so I can keep track.
I use a 28 day pill box and keep every screw separate and reburn to exact slot because they all vary in length, width and can really damage u phone if too long and nt secure if to small. use a magnetised screwdriver, or make the cheap freebees magnetic for a short period by rubbing it up an a magnet. lol
Absolutely ridiculous had to go get a different one just stupid
Was able to get the outer bracket screws out using fine needle nose pliers 90 degrees straight down for the outer ones by pressing down a little and using medium gripping force. Had to take these out first before i could use tweezers on the middle one, for which I had to use tweezers to hold the screw, then rotating the bracket (not the screw) counter clockwise a few mm many times over to slowly unscrew it 1/32th of a turn at a time, repeat. (this loosened middle screw). Think ‘rotating bracket 3minutes/degrees counterclockwise at a time while holding screw in place.) You are gonna need really small/fine pliers and tweezers for this because the heads are countersunk into the bracket.
To help tell if the screw is turning, put a small dot from a marker on the head of the screws. This helped me to know I wasn't just stripping the head.
try heating the iPhone with a hairdryer or a bag of rice or about 60 degrees in an oven for 3 minutes . It has worked for me. If the screws don’t come out while hot the will come out as the iPhone cools.
-
-
-
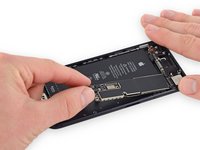
Remove the lower connector bracket.
my battery cable connector was stuck to the bottom of this metal bracket plate so be careful when you lift it off
This may have been intentionally done by Apple to make sure the battery gets disconnected before any other connector is disconnected. So always make sure to disconnect the battery before disconnecting and reconnecting the connectors for the display.
So…I forgot to put this bracket back on when reassembling. Now I’ve adhered the display to the case and don’t have another adhesive strip…so I’m wondering: what purpose does this bracket serve? The phone is powering on and seems to work okay.
Am I going to run into trouble with this bracket missing?
Well, that didn’t last long. The phone shuts down without warning. So I guess that plate is important…
I also forgot to put the battery shield in, and adhered the display. I’m tempted to leave it like that. However, your negative experience is a good data point telling me to not be cheap.
Ordered a new adhesive , under $2 shipped from eBay.
Thanks, Josh Martin! Mine was stuck too, so I lifted carefully.
-
-
-
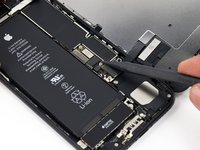
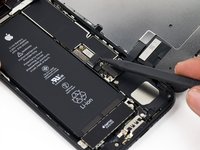
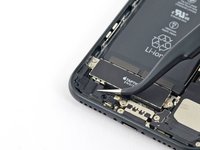
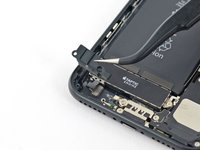
Use the point of a spudger to lift the battery connector out of its socket on the logic board.
Was kann passieren wenn man diesses Kabel vergessen hat zu entfernen `?
Reconnecting the battery poorly can cause the iPhone to appear to be properly powered and functional, but then suffer a reboot loop.
I had difficulty after a screen replacement, and the Console app on my Mac showed that the ‘thermalmonitord’ process was throwing lots of errors from not getting any sensor readings from the battery. It would never charge past 1% and just kept rebooting.
The contacts on this conector looked fine so even though I had reseated this connector several times already, I reconnected it very firmly using my thumb and a spudger to really press all the corners and middle and really gave it a good massage and then finally it showed the normal dead battery screen and started properly charging and eventually booted back up to normal functionality.
It seems the battery has to be able to transmit data to the phone to say it’s not overheating or iOS will not allow any current into the battery to recharge it, and the kernel will panic from the null readings and just reboot over and over again.
In my case, the battery connector was attached to the bracket. We just left it connected bracket when we pryed it up.
Reconnecting the battery connector was a bit difficult in my case. The cable that comes out of the battery was a tiny bit too long, or that I placed the battery a bit too high (i.e., too close to the top of the phone). It took me several frustrating minutes of fiddling with the connector for it to sit right into the socket. I was not sure if that was connected correctly but, alas, the phone came back to life when it was turned back on.
VERY IMPORTANT NOTE: Please READ the reply here by jason.
It is very easy to knock off or nudge the little pins near the battery socket, see https://guide-images.cdn.ifixit.com/igi/... and https://guide-images.cdn.ifixit.com/igi/....
Those pins are the data lines to extract battery info: temperature, charge, etc. If you accidentally nudge/knock off them the phone could appear to work normally, even for a few days. But then you will start getting wrong battery reads and then after that it may suffer a reboot loop. If you enter settings > privacy > analytics & improvements and you scroll down you will find panic errors from thermalmonitord that there are missing sensors (TG0B or TGXXX) and you will have to micro solder them. DO NOT NUDGE THEM and double check the socket connector when reconnecting the battery.
after installing new ifixit battery kit, note the foam on the new battery is thicker than old apple one, managed to remove the old foam and swap to new battery connector, sheild plate now level
-
-
-
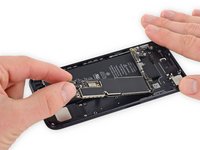
Use a spudger or a fingernail to disconnect the two lower display connectors by prying them straight up from their sockets on the logic board.
To be honest you don’t really need to disconnect the display cables in step 15 or 16 to get the battery out. Just keep the suction cup on the screen to keep it propped up and to give the cables some slack. The only reason to take these cables off is that it’s a pain to apply the replacement display adhesive with those cables in the way. If you’re not re-waterproofing your phone just leave these attached.
MAKE SURE you hold the top screen when dislodging the cable connections. I let the screen lie flat down and ended up tearing one of the cable connections, now my touch ID does not work at all! I’m going to have to order a whole new screen.
Don’t miss that SECOND CONNECTOR like I did. It will break very easily if not disconnected :(
I replaced the screen and have ended up with a blank screen. Touch control seem to work (touch button works and I can shut down the phone by pressing power button for some seconds and then swipe left to right in the upper part of the screen). But the screen is blank. I’ve tried to disconnect and connect the two connectors in step 16 but with the same result (blank screen). What do I need to do?
Thanks for advice!
this point is the most important in the whole manual.
Please pay attention not to strain the flex cables or they will end up breaking
I should have been more careful - the second cable tore off.
My own fault after having done this replacement about four times previously without any issues, I clearly got cocky and didn’t pay enough attention.
Be VERY CAREFUL and remember to unplug those cables. Don’t skip steps.
I’ve now had to order a replacement screen.
If you replace the screen and there is no display apply io propyl alcohol 99.9 & purse to both connectors on the screen and on the iPhone with a clean toothbrush and let them dry for 45 minutes and then fit the screen and reassemble the iPhone..
It works for me . when I get a new screen I do t5his before fitting it.
I tried to save time by not removing the screen during battery replacement as some comment here, HOWEVER, I ended up having to use a little force to remove the battery and in the process broke the second, lower smaller cable, resulting in loss of home button function and needing to get a new screen. Next time I will follow these steps and completely remove the screen during a battery replacement
I removed the screen and cable still got ripped during reassembling :(
Viktoria -
There is a critical fact missing from the steps here, for reassembly: That bottom (underlying) cable is longer than it should be. Loads of people are reporting that the Home button is dead after this repair, but the cables aren't torn. I'm pretty sure this is why. Here is a picture of the problem.
When reassembling the phone, you must poke this cable back into the body of the phone while you bring the halves together, or you will crush, crimp, and destroy the cable.
I’m only reading your very useful comment now, after the exact thing happened to me and my cable got ripped during reassembling phone. Would you be able helping me naming this part, so I can look for a new one? Thank you very much!
Viktoria -
thanks gavin. ifixit should have included this piece of info.
-
-
-
Remove the two 1.3 mm Phillips #000 screws securing the bracket over the front panel sensor assembly connector.
Has anyone had trouble getting these two screws off? I’ve been working on these for about 10 minutes and the LEFT screw wont spin. It seems like the little PH000 screwdriver bit won’t even grip it. (The one of the right comes off, no problem)
It looks like I’ll have to pick this project up again with a screwdriver that will actually take off this piece.
If you’re having trouble removing these screws;
the screw on the right goes into a standoff screw that is screwed into the frame.The left one goes into the logicboard.
If your phone is used most likely it has been repaired in the past and the person that repaired it put the screws in way too tight.
If your phone is brand new And you know 100% it is then the problem is your screwdriver.Stop before you strip it completely and buy a better screwdriver (EBAY).
If you already stripped the screw head take the phone to a shop before you break it.
there are ways to get them out but truthfully it’s extremely dangerous and sometimes your better off quitting while you are ahead.
I used a #1 flat head tip to loosen.
I couldn’t get the two screws out either—used the correct screw tip and everything. Stripped the screw. Will now attempt to just keep the cable attached…..
Use the PH000 and apply a little more force before spinning, should come right out!
^To anyone having trouble, this is the correct answer. Put the phone on a firm surface, align your driver carefully, press down hard, and twist. As long as your driver is approximately the right size, it’ll come out.
the two screw i have are stripped and i have n way of getting either screws off whats my next bet
The PH000 bit is to large. I can’t get the screws out either which really sucks…now I have to put everything back together, find another bit that will work and try this again another day. Not impressed with IFIXIT’s attention to detail so far :-(
Using iFixit’s driver kit, I prefer a PH00 for this, which is larger than the PH000. If you think the PH000 is too big, something is wrong.
I think part of the issue with the iFixit PH000 is that it is slightly too pointy. The PH00 fits better because the splines engage the slots of the screw before the point bottoms out. The PH000 tip bottoms out in the screw’s center point and the splines don’t engage as well. I have other PH000 tips that are more blunt nose and they work better than the iFixit bit.
PH000 screwdriver didn’t work for any of these screws, or the barometric vent, or the taptic engine. It was too big. I had to use a different screwdriver from another kit I had.
the cable tore. is that it i need a new phone?
You don’t need a new phone, but your selfie camera and phone speaker will not work. You can get replacements for that about $10.
Reconnecting this cable and coverplate took a good 20 minutes. O_O
I also had issues to loosen up the screws, in two parts the right side up and the left side down, i think the PH000 is to pointy or something or its too hard for the srews of the iphone, i cannot take it off and know im regreting i bought i order all the way from Paraguay in south america and know so angry it doesnt work
I skipped this step. Just be really careful not to pull on the screen.
The guide says they changed these to the Y000 “at some point in the t middle of the product’s lifecycle”…
That can’t be true, I have a *day one*, preordered iPhone 7, and mine had, unmistakably, Y000 screws!
and also, I’m just faithfully following the guide here, but can anyone clarify *why* is is necessary to entirely remove the display AND the Taptic Engine at all? The battery seems accessible just fine… oh well
PS- I’m doing this on an older backup iPhone 7. My iPhone 12 Pro just went berserk and stopped working completely a little over a year after I got it day one of its release… since the iPhone X I’ve only had easily breakable, overly sensitive phones. I’ve had every numbered iPhone except for the 8 (I got the X released at the same date) and the 11, and man, are these newer iPhones post X fragile!
Indeed - I also had some problems with the righ screw: ...a standoff screw that is screwed into the frame - like above explained...! Suddenly I had three screws in front of me and was a little surprised... Ok You have to mount first this screw again - with a small flat srewdriver - otherwise You could not fix the Metalstripe on both sides, because the second small screw has no grip!
-
-
-
Disconnect the front panel sensor assembly connector from its socket on the logic board.
Das ist sehr mutig, das Kabel dort so zu strapazieren.
Mich würde das Display daneben stellen und mit irgendetwas stützen, dass es nicht umkippen kann um Beschädigungen an dem Kabel zu vermeiden. Das reißt sehr schnell ein.
Is this the connector for the earpiece, as well? I did the screen replacement and everything worked, except now I can’t use my earpiece… I’m afraid I didn’t fully connect this particular portion.
@victorbui714 Correct, this is also the connector for the earpiece speaker. Check the flex cable carefully and make sure it wasn’t pinched or torn. Make sure the connector socket is clean (give it a blast with some compressed air if needed) and try reseating it. If that doesn’t help, you may want to remove the earpiece speaker and inspect the four springs on the back, and check that they’re intact and making good contact with the four circular pads on the flex cable. Give the pads a wipe with some IPA and try not to leave any skin oils on them. If none of that works, try replacing the entire flex cable/sensor assembly. Good luck!
This is the only connector that is quite easily possible to put back in the wrong way. If you do so, the phone will just get into a continuous loop where it shows the boot screen, goes blank and then shows the boot screen again and again. If this happens, do not despair-just put it back in the right way.
After putting together, I had a continuous loop boot up (as noted above). I saw articles where this (front panel sensor connection) was the reason. I disconnected this connection and the boot up loop stopped. I tried reconnecting several times but had the same problem (boot up loop). However, it turns out that I needed to apply extra pressure when installing until a heard a (faint) second click when pressing down. Note - before I was using the spudger to press the connection together, which didn’t do the job. I ended up using my finger to press harder to get it to click in. Solved that issue.
The ribbon cable on this step is torn. Is this something that can be replaced? Is this only to the earpiece?
The ribbon cable on this step is torn. Is this something that can be replaced? Is this only to the earpiece?
-
-
-
Remove the display assembly.
When removing the screen, be aware of the two tiny square black rubber grommets on the Penelope screw brackets that secure the screen. They can fall off very easily and be lost without even knowing it (it happened to me, but was lucky enough to find them).
Sorry, I’m so unclear about when to replace the Adhesive tape. Should I put the iPhone 7 Display Assembly Adhesive at this step, or after I’ve replaced the battery?
@victorbui714 Battery first, then adhesive during reassembly, as it says in the instructions. ;)
This is the 3rd screen iv put in my phone and everyone them bust at the top by the camera every time iv bought one of these screen idk if it’s the manufactures fault or what?
@trentb28922 Ouch! That’s not normal. Is your phone’s frame bent? Are you having to use a lot of force when you install the display?
If the instructions are followed step by step, then adding the adhesive comes before changing the battery.
If I had to do it all over again, I'd skip adding the adhesive, because you have to disconnect the battery, plus the two lower display connecters and the front panel sensor assembly connector. It was a nightmare trying to marry the components back together without disturbing the wire prongs, and I don't even want to talk about reinserting the tiny screws that kept twirling around on the tip of the screwdriver as well. It wasn't worth the time or aggravation!!
If you decide to skip this step, just avoid using your iPhone near water.
Ich habe das Display nicht abgenommen, sondern mit Hilfe von Tesafilm und Styroporstücken in einem Winkel von ca. 80° Winkel fixiert und nicht demontiert! Das ging auch sehr gut und ich musste nicht noch mehr von den empfindlichen Steckern zum Touch und Display trennen!
-
-
-
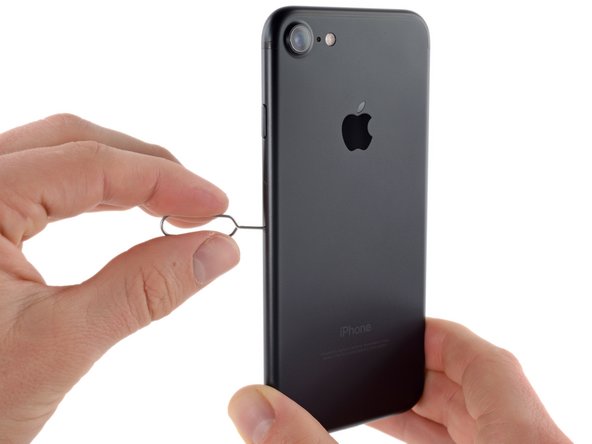
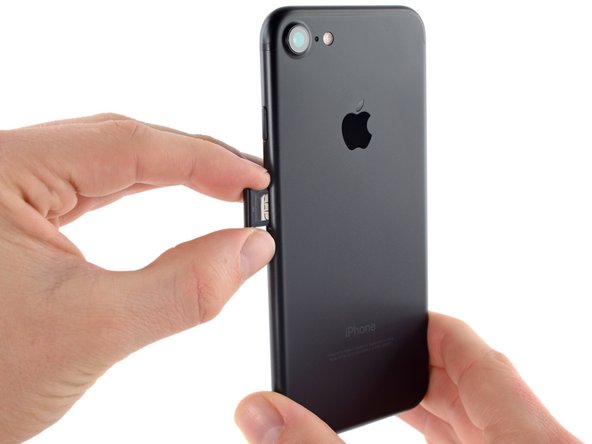
Insert a SIM card eject tool or a paperclip into the small hole in the SIM card tray.
-
Press to eject the tray.
-
Remove the SIM card tray assembly from the iPhone.
Received a sim card tray from IFIXIT for my iphone 7. I can’t seem to get it to close flush no matter how hard I try. Any suggestions?
Why would it require a significant amount of force? Is it because the iPhone 7 is water resistant? When I removed my tray it was like it was stuck in goop inside the phone and the tray had a glue like sticky substance on it? It did not ‘click’ back in smoothly like my other iPhones, I had to push it against the ‘goop’. Is this normal for iPhone 7??
I used the tip of the super pointy tweezers, and it worked well.
-
-
-
Use the flat end of a spudger to disconnect the rear-facing camera connector.
-
-
-
-
Remove the following Phillips screws securing the rear camera bracket to the rear case:
-
One 1.3 mm screw
-
One 2.5 mm screw
-
-
-
Use the pointed end of a spudger to pry up and disconnect the antenna bus connector, just left of the rear camera module.
There is one Step missing before removing the flash light cable: Remove Camera cable, right?
I broke this and can’t find it on amazon. Is it part of the volume control flash connector? If not, can you send me a link on where to find this connector,…and possible instructions on how to replace?
-
-
-
Remove the two 1.2 mm tri-point screws securing the upper cable bracket.
these are too tight cant get rid off them from y000
Had to push down to get the Y000 in place
-
-
-
Use the flat end of a spudger to disconnect the upper cable connector.
-
-
-
Remove the four Phillips screws securing the Wi-Fi antenna:
-
Three 1.2 mm screws
-
One 1.7 mm screw
I lost one of these 1.2 mm screws. Will that affect the signal reception?
How do you open the 1.7mm screw? LOL
Yes : 4 screws and not 3 !!
-
-
-
Remove the top left antenna.
-
-
-
Remove the following Phillips screws:
-
One 1.3 mm screw
-
One 2.2 mm screw
-
-
-
Remove the bracket.
What's this bracket called
-
-
Инструмент, используемый на этом этапе:Standoff Screwdriver for iPhones$5.49
-
Remove the 2.2 mm standoff screw from the grounding bracket.
What bit is this? The link doesn’t use the same name.
I hate getting the deep into a repair to find there’s a tool missing. This bit should be part of the toolkit!
Its in the toolkit now. Looks like a Philips head but up close the end is squared off with a point in the middle.
I received two boxes - one box contained the repair part, the other was the tool kit. I only opened the tool kit before disassembling the phone. The standoff screwdriver bit was not in there. Neither was the guitar pick. I used a real guitar pick and a small standard screwdriver from my toolbox. When I was ready to reassemble, I opened the repair part box and guess what was in there - the standoff screwdriver bit and guitar pick. So, I guess if you just order the part it will come with (at least) those two tools. The tool kit contains tweezers, suction cup, three screwdriver bits (tri-point, pentalobe, and phillips) and screwdriver handle, a long black spudger with a flat end and a pointy end, and a smaller, thicker spudger with a wide, flat ends.
The flat end of the spudger works a treat too.
Thank you, bronyar. Since there is a box labeled “Repair Tools”, I never would have looked in the parts box for tools. I was able to use the standoff tool to takie the phone apart, not just to put it back together.
-
-
Инструмент, используемый на этом этапе:Tweezers$4.99
-
Use tweezers to gently bend the logic board grounding bracket out of the way.
I accidentally broke the grounding bracket, is it very important to get a new one to replace? as I can't seem to find them for sale anywhere
I also broke it. Did your phone work after?
Did you find a replacement?
Did your phone work ?
Emin -
I broke mine while doing this step. A bit confusing. You’re just supposed to bend it out the way, not pull on it entirely. Will the phone still work without this?
I just didnt bend this one.. Ill tell you how it went
-
-
-
Use the point of a spudger to lift the two antenna cable connectors up off of the sockets on the logic board.
-
-
Инструмент, используемый на этом этапе:Tweezers$4.99
-
Use tweezers to gently derout the antenna cables from the metal bracket on the logic board.
-
-
-
Use the point of a spudger to disconnect the lower cable connector.
-
-
Инструмент, используемый на этом этапе:Standoff Screwdriver for iPhones$5.49
-
Remove the following screws:
-
One 1.4 mm Phillips screw
-
Three 2.2 mm standoff screws
Link may be missing or broken!
Standoff screws are best removed using an [linked product missing or disabled: IF145-343-1] and driver handle.
-
-
-
Use the point of a spudger to move the SIM card eject plunger out of the logic board's way.
-
-
-
Use the flat end of a spudger to gently lift the battery connector end of the logic board up.
-
-
-
Lift the battery connector end of the logic board and pull it up and out of the rear case.
-
-
-
Remove the two 1.9 mm Phillips screws securing the barometric vent to the rear case.
I didn't see the necessity, so I didn't remove the Barometric Vent since I decided I wasn't going to uplug the Taptic Engine, although I did remove screws for the Taptic Engine, but I didn't unplug it. I believe the point of removing the Taptic Engine is to gain access and space to pull the adhesive strips off the battery. If you attempt and are able to remove the adhesive off the battery, then I believe it's NOT necessary to remove the Barometric Vent nor the Taptic Engine.
-
-
-
Use the flat end of a spudger to disconnect the Taptic Engine connector from its socket on the logic board.
-
-
-
Remove the three 1.6 mm Phillips screws securing the Taptic Engine to the rear case.
-
-
Инструмент, используемый на этом этапе:Tweezers$4.99
-
Use a pair of tweezers with blunt tips to peel back one of the adhesive strips on the lower edge of the battery.
-
-
-
Use a pair of tweezers with blunt tips to peel back the other adhesive strip on the lower edge of the battery.
-
-
-
Slowly pull one battery adhesive tab away from the battery, toward the bottom of the iPhone.
-
Pull steadily, maintaining constant tension on the strip until it slips out from between the battery and the rear case. For best results, pull the strip at a 60º angle or less.
-
-
-
Repeat the previous step for the second strip.
-
If you removed both adhesive strips successfully, skip the next step.
-
Otherwise, if either of the adhesive strips broke off underneath the battery and could not be retrieved, continue with the next step below.
-
-
Инструмент, используемый на этом этапе:Plastic Cards$2.99
-
Prepare an iOpener and apply it to the back of the rear case, directly over the battery. Alternatively, you can apply heat using a heat gun or hair dryer.
-
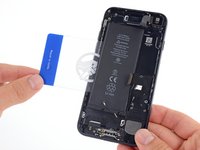
After about a minute, remove the iOpener, flip the phone over and use a plastic card to break up any remaining adhesive behind the battery.
-
-
-
Remove the following Phillips screws:
-
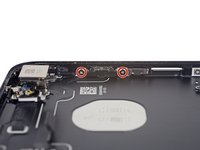
Two 1.9 mm screws securing the power button.
-
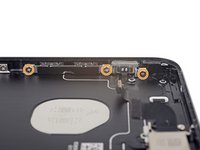
Three 2.3 mm screws securing the volume buttons.
-
-
-
Remove the following 1.3 mm Phillips screws:
-
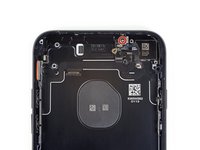
One screw beside the rear-facing camera
-
One screw on the rear case
-
-
-
From the outside of the phone, push the hold switch into the rear case with the point of a spudger.
-
This action will free the hold switch and gasket from the rear case.
-
-
Инструмент, используемый на этом этапе:Tweezers$4.99
-
Use a pair of tweezers to remove the rear-facing camera.
-
-
-
Moving from power button side of the phone, use an opening pick to separate the adhesive holding the antenna flex cable to the rear case.
-
-
-
Slide the point of an opening pick underneath the antenna flex cable towards the top of the phone, separating the remaining adhesive.
-
-
-
Use tweezers to move the antenna flex cable away from the edge of the phone, freeing the screw bracket from the rear case.
-
Remove the antenna flex cable.
-
-
Инструмент, используемый на этом этапе:Halberd Spudger$2.99
-
Use the blade of a Halberd spudger to separate the adhesive holding the microphone to the rear case.
-
-
-
Slide the blade of a halberd spudger under the power button end of the button cable to separate it from the adhesive on the rear case.
-
Continue to separate the adhesive by moving the blade towards the top of the phone.
-
-
-
Continue to move the blade of the halberd spudger underneath the power and volume control cable.
-
-
-
Slide the halberd spudger under the volume control portion of the button cable.
-
Gently slide the blade underneath the cable towards the bottom of the phone, separating the remaining adhesive.
-
-
-
Remove the power and volume control cable.
-
To reassemble your device, follow these instructions in reverse order.
To reassemble your device, follow these instructions in reverse order.
Отменить: Я не выполнил это руководство.
36 человек успешно провели ремонт по этому руководству.
8 Комментариев
Hello,
how can I disassemble and assemble the mute button from the flex cable. because most spare part cables are without mute button…
thanks
the mute button can slide out. there is space on the side that is not marked red. it looks like three clips hold it in but simply grab hold of the button nob thing with tweezers and slide or wedge it out from underneath that bar that goes around the side with the red line and then once it’s out you can slip that button into the new flex
hahaha aqint that the truth LOL
After reinstalling the volume and power buttons and brackets & clips, my power button won’t turn phone off/on; my volume control seems possessed and does what it wants, lol. Help!
silly question, did you insert the tiny O-Rings to each of the buttons before pushing them into the case ?!?
Because i think between those O-Rings and the clips, it gives the right amount of tension/compression to allow the buttons to operate
This guide for the power/ volume ribbon is not on the 7+ page, so I found myself here. This guide is very accurate and mostly similar. I didn’t have much trouble, but there are a few extra steps that aren’t on the normal 7. (things like a few extra screws and and ribbon connectors) If your using this guide for the 7+, not knowing to unscrew a few extra screw could be the end of your phone. Especially the extra screw in the center of the logic board! (Which obviously isn’t in this guide because its for the normal 7)
Bouncing back and fourth from the available 7+ guides gave me the info that was missing in the particular guide, and was only a bit of a pain. Manageable tho with a little extra brain power haha.
PLEASE MAKE THIS GUIDE FOR THE iPHONE 7+! It would be greatly appreciated by many users! Not to mention there are still many 7+ users out there and it would be very helpful.
-thank you!
I was trying to replace the charging port for my iPhone 7 Plus , however once I am done with the charging port replacement , both of my volume keys and mute doesn’t work , it worked before I did the replacement . I am wondering which connector I might not connect it well ? Anybody can help with that ?









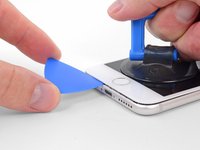


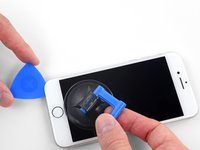
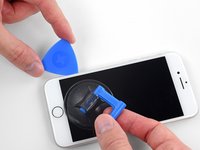
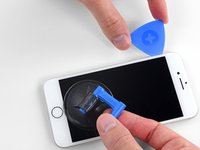























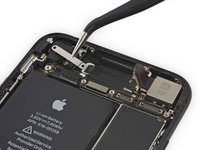


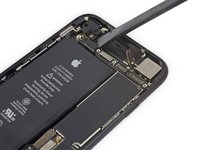
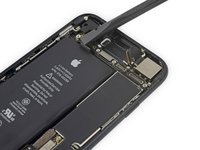


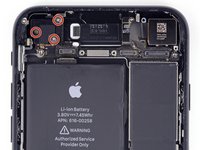
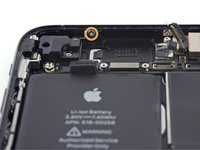


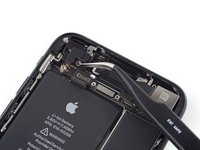
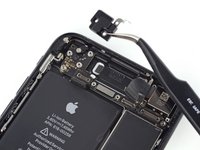


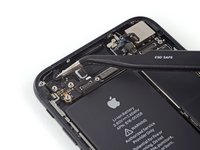
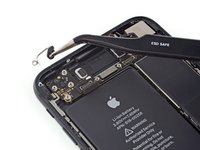


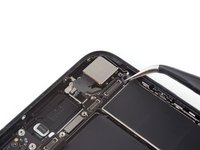
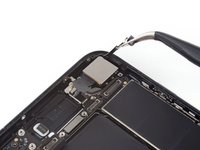


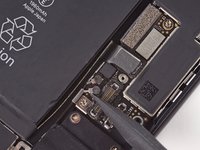
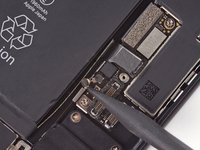
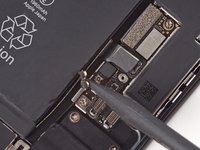


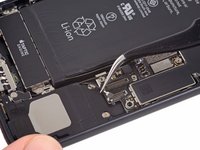
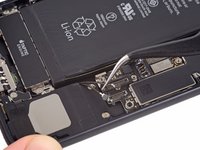
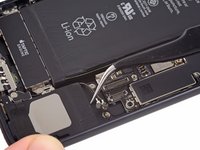


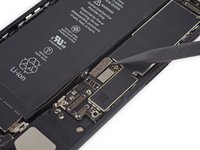
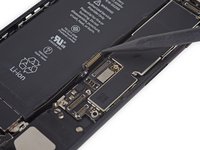


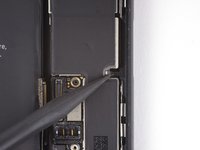








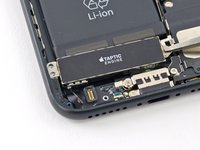
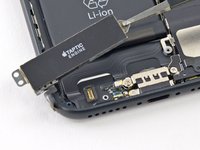


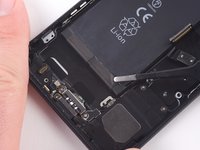
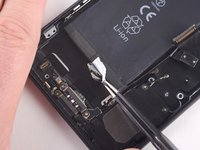

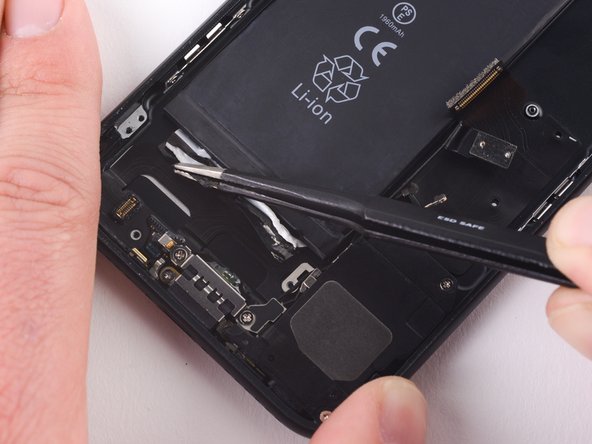


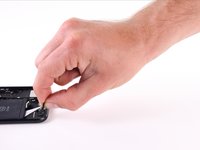
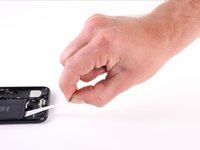
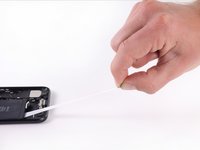






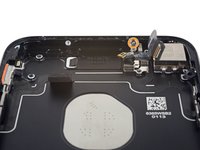


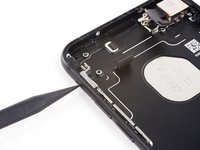
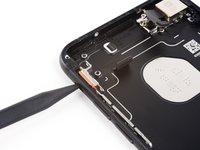


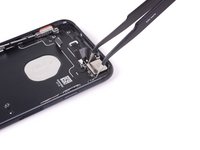
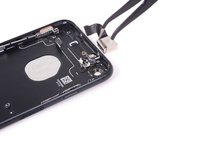


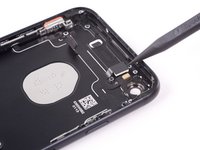
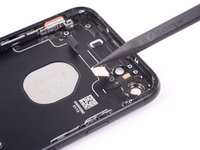


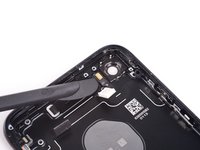
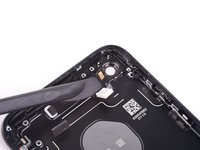


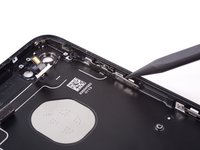
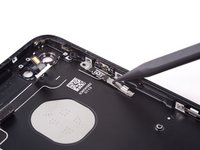


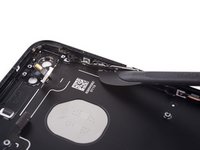
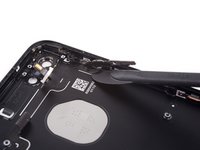
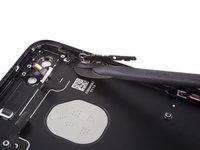


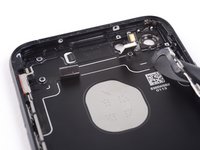
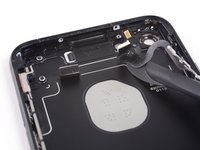
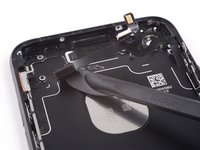


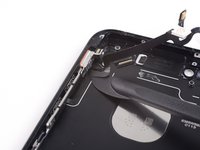
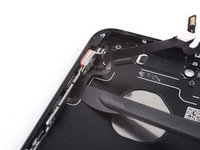
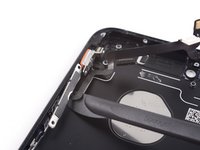


Can anyone confirm 7/7P's pentalobe screws have a ring of seal near the screw head?
Cooper Chase - Ответить
Confirmed, the screws have a black ring seal around the head.
rcheing - Ответить
Can’t get the display front
Bernadette Pfeifer - Ответить
From personal experience, I highly recommend before doing this procedure or any other, that you do a backup of your phone (preferably local) in case your procedure goes south.
ballina5ny - Ответить
I purchased the repair tools with the replacement battery from iFixit. The tools include a screw driver and three heads none were labeled 3.4 mm. I think the one that fit the pentalobe screws was labeled Y000. The guide should identify the screw driver head supplied by the kit not 3.4mm.
Mark Lieberman - Ответить
in the iphone 7 replacement battery kit from iFixit, the screwdriver that fits the 3.4 mm pentalobe screws is labeled P2 (and not Y000)
Jan-Tijn Oppermann -
3.4 mm is the height of the screw and is not related to the screw driver code.
Ahmad Vaziri -
the screwdriver PH000 does not work i wasted two screws and now they dont have the 4 cross mark they are now a circle, i buyed it all from Paraguay and it doesnt work, had to assembly back the parts because i got stuck like i mention with some screws, well im just going to send to a professional to install, thanks
Martin Frutos, Nuñez - Ответить
The bottom screws are Pentalobe, not Phillips.
Bram Driesen -
Before starting, I would recommend backing up your Iphone’s data just in case.
Jon Moylan - Ответить
If you managed to make it to this section, just send the phone into apple for 50 + 6 dollars shipping. The ribbon cables on the screen are designed to break. I can literally twist on the rest of the cable and it won’t fall apart but there is a diagonal section where it snaps. This is the fault of apple and the fault of ifixit for misrepresenting the fragility of the cables.
Ryan Huebert - Ответить
Had to reheat it a few times for a minute each with a hairdryer to get the seal to break after pulling and rocking the suction
Cynthia Lamb - Ответить
I’m technically challenged. Is there a premier national service who can professionally install a replacement battery got my 7 +?
Richard - Ответить
Do the screws come out in total?
YVES THEUGELS - Ответить
They may come out or may not. If you loosen as much as you can and they don't come out you should still be able to pry open the bottom. Once you get the screen off you can then push the screws out from the inside.
Anthony Falabella -
Is it the P2 you should use for the bottom??
YVES THEUGELS - Ответить
I heated the bottom of the phone with a hairdryer and then used a syringe to put a couple of drops of acetone directly into the bottom two screw holes. I GENTLY pulled on the screen with the suction cup and used the pry tool to GENTLY separate the screen. The sealant is applied around the entire display so be very careful pulling it off so you don’t break the fragile display cables.
Anthony Scaminaci - Ответить
At first it was very difficult to open, per instructions. I used a heat/ice pack and nuked it for 1 minute. The pry tool wasn’t working so I carefully used my pocket knife to wedge the cover open. The rest of the procedure went well until I cracked the glass while trying to get the top right corner to pop off. Other than that mistake, all went well. Tip: before setting the new battery, attach the battery connector first and leave enough room for the taptic engine, or better yet, place the taptic engine before adhering the replacement battery. This way you’ll have a small gap between the two, whereas mine barely fit. Good job on hosting the video, Gwendyl.
Klaus Preiss - Ответить
I love the fact that the screw bit and shaft are magnetic! I almost lost a screw and found it attached to the magnet.
I used a heat/ice pack and nuked it for 1 minute. At first the display cover was very difficult to open with the pry tool, per instructions. The pry tool wasn’t working so I carefully used the blade of my pocket knife to wedge the cover open. The rest of the procedure went well until I cracked the glass while trying to get the top right corner to pop off. Other than that mistake, all went well. Tip: before setting the new battery, attach the battery connector first and leave enough room for the taptic engine, or better yet, see the taptic engine in place before adhering the replacement battery. This way you’ll have a small gap between the two, whereas mine barely fit because I placed it almost too low.
Good job on hosting the video, Gwendyl.
Klaus Preiss - Ответить
I replaced the lightning connector assembly and reassembled. The old one did not 'click' into the cable and had corrosion inside, it needed the cable to be placed in a specific way to charge. The new part - does not recognize that a charger is plugged in at all.
I backtracked the assembly - took it apart, put it back again - and find that every thing on the part works - the mic, speakers, taptic engine.
The original problem with the cable still persists. Any ideas?
H K - Ответить